I am starting development of my second plugin “Path Set: Infinity” and thought it would be interesting to share my development process in this blog.
The idea for this set started with my AstroVibe module. It’s an oscillator with a large number of internal configurations that you can randomize and save, but you can’t control. I thought it would be fun to explore that concept more.
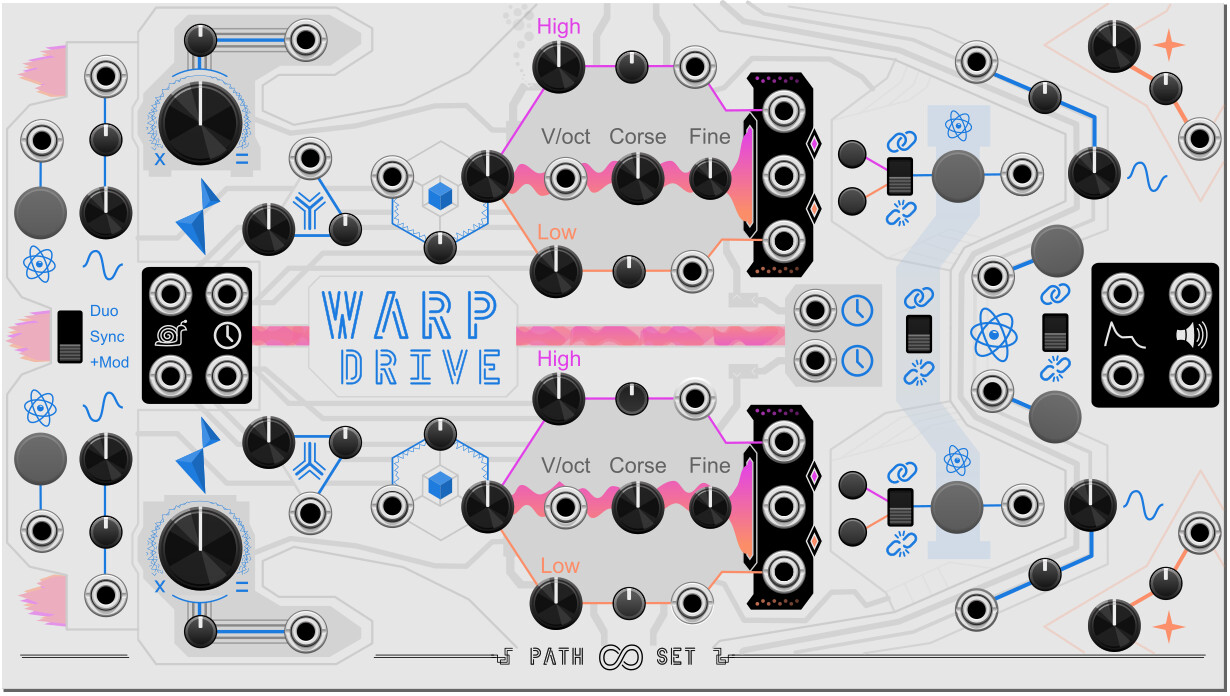
The first module for this set I am creating is Warp Drive. I wanted to build off the space theme of AstroVibe and I thought the visuals of a starship diagram would make for a fun panel on a module. I imagined two parallel drives, each their own voice.
When thinking about what kind of sounds I wanted, I thought back to Omri Choen’s video on frequency modulation. I liked the idea of chaining simple oscillators together to create more varied sounds. I also like making big complicated things, so I decided I would use five copies of an oscillator for each side of the drive for a total of ten oscillators inside the module.
I set myself the task of designing just one of those ten oscillators. I created a simple prototype using javascript and the Prototype module. This combination allowed me to try many different ideas very quickly until I had a basic building block I liked,
I started copying the prototype module inside of VCV Rack. I hooked two more to the original’s FM input. I used CF’s Algebra module and to mix them and that created a good range of settings. But I was still short of the five-oscillator goal I had set. So I experimented with what else I could do. I modified another oscillator so it could create different envelopes for the output. And the last oscillator became and LFO that also doubled as a clock.
This gave me a solid base for one drive of the module, but I also wanted to have interplay between the two drives. I wasn’t sure what interactions would create interesting sounds and I wanted to figure that out before designing the panel. So I copied the modules again :). By now my CPU was starting to sweat, but javascript interpretation is a lot slower than the final compiled c++ code will be, so I pressed on.
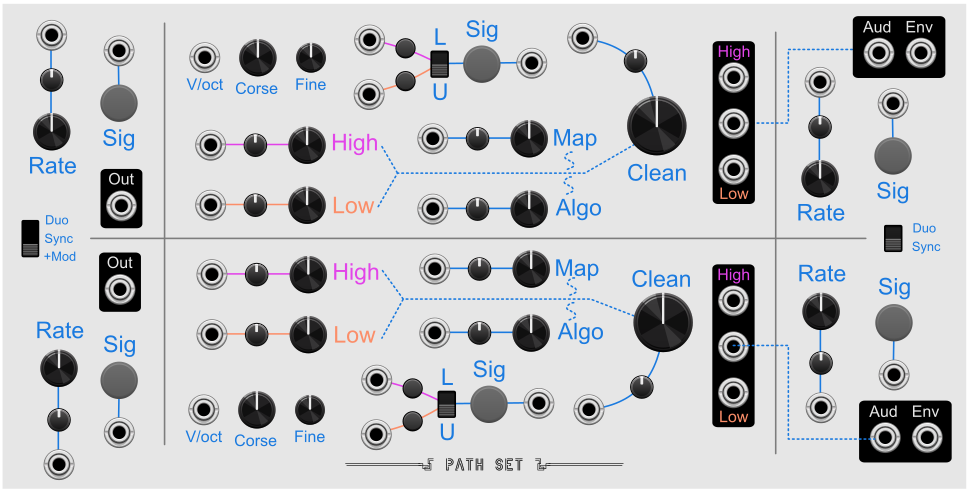
To help make this easier to managed I started adding external controls using buttons and knobs from RCM. These are big and bright and allow me to label the controls. I used switches and other utility modules to quickly test different interactions. I threw away ideas that weren’t working out and expanded on the ones that did. Eventually I good set of controls that I really liked. That looks like this:

That’s where I am now. My next steps are the panel design and then converting my javascript into C++ code. Those will both go fairly smoothly since I all of this prototyping to figure out how WarpDrive will eventually work.
If you found this interesting please give this post a like. And if you’d like to know more about my development process please leave a comment.