I’ve prototyped a new interface module. This thread is a combined announcement, planning thread, and request for early community engagement around features. Here are plans, details, background, caveats, and thanks, and here is the feature roadmap.
Update here as of 6/2: the alpha is in good shape and running about a week behind target.
Update [here] as of 9/13: the alpha completely blew through its target and is now on hold pending the immanent release of Rack 2, but I remain extremely committed to the project. Best guess for a full release is Q1 2022, but anyone who’s interested should be able to try it well before that.
Introduction
TapPatch brings fast and fluid MIDI and key-driven cable patching to Rack. It works with your rack in its current state, with no setup required.
Input and output ports visible onscreen are selected by tapping pads or pressing keys to select divisions of a grid, while positional, directional, and color cues appear simultaneously in the Rack window, on the module’s pads, and on feedback-capable MIDI controllers.
When both types of port have been selected, cables can be added (with optional color choice) or, if a cable already exists between the ports, it can be deleted.
MANY more features are under development or mapped out (to give you some idea, there will be three more pads, named Module, View, and Control) but even these basics will take you pretty far towards patching by tap.
Basic Operation
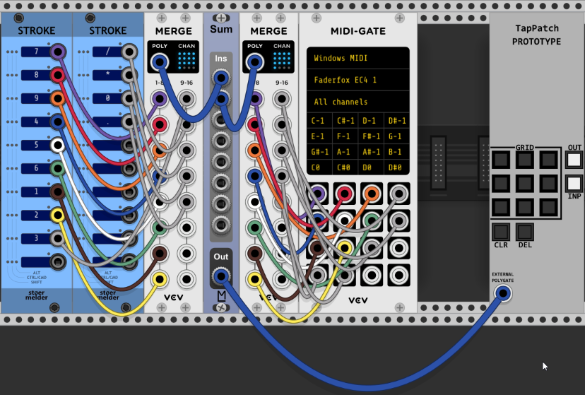
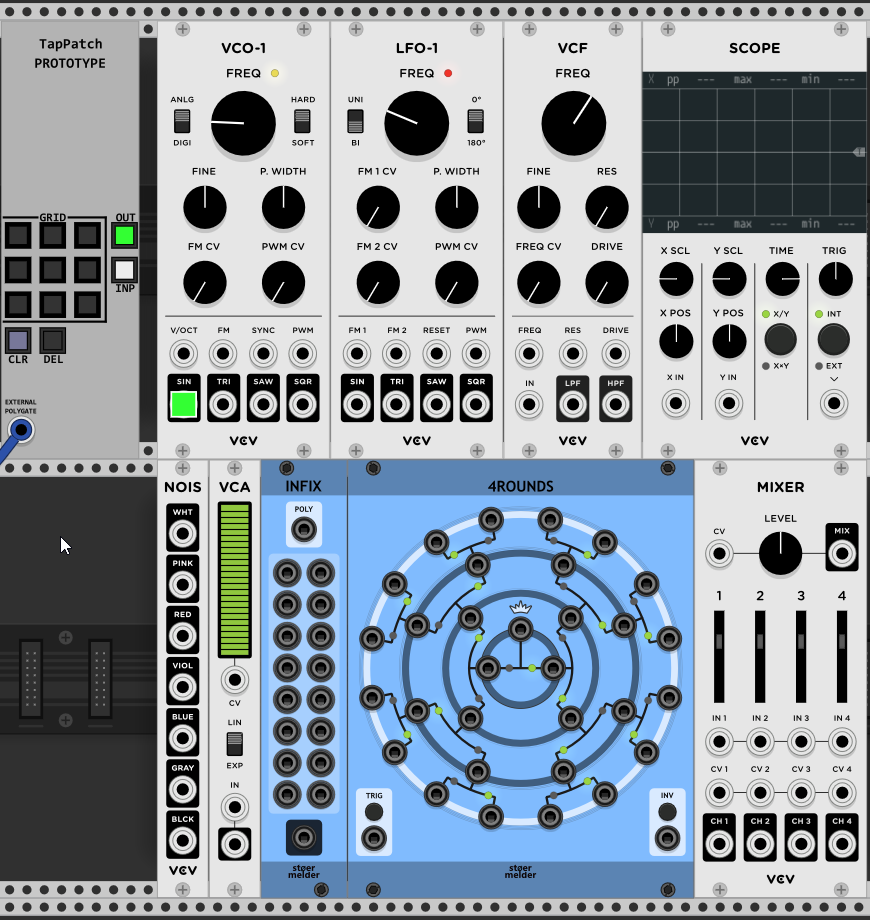
When TapPatch is freshly added, all pads are dark except for [OUT] and [INP], which are colored white. This indicates that neither an output nor an input port is currently selected.
Adding a cable has three steps: select one port, select the other one, and pick a color. That’s it! To select ports, we enter…
PORT SELECTION MODE
To start selecting an output port for the virtual volts in your new cable to flow from, tap the [OUT] pad. This will put TapPatch into Port Selection Mode, targeted to output ports. (The suggested mapping for the [OUT] pad, by the way, is the upper right hand pad of a 4x4 MIDI controller, or the / key on a numeric keypad; you can also click on it if you like.)
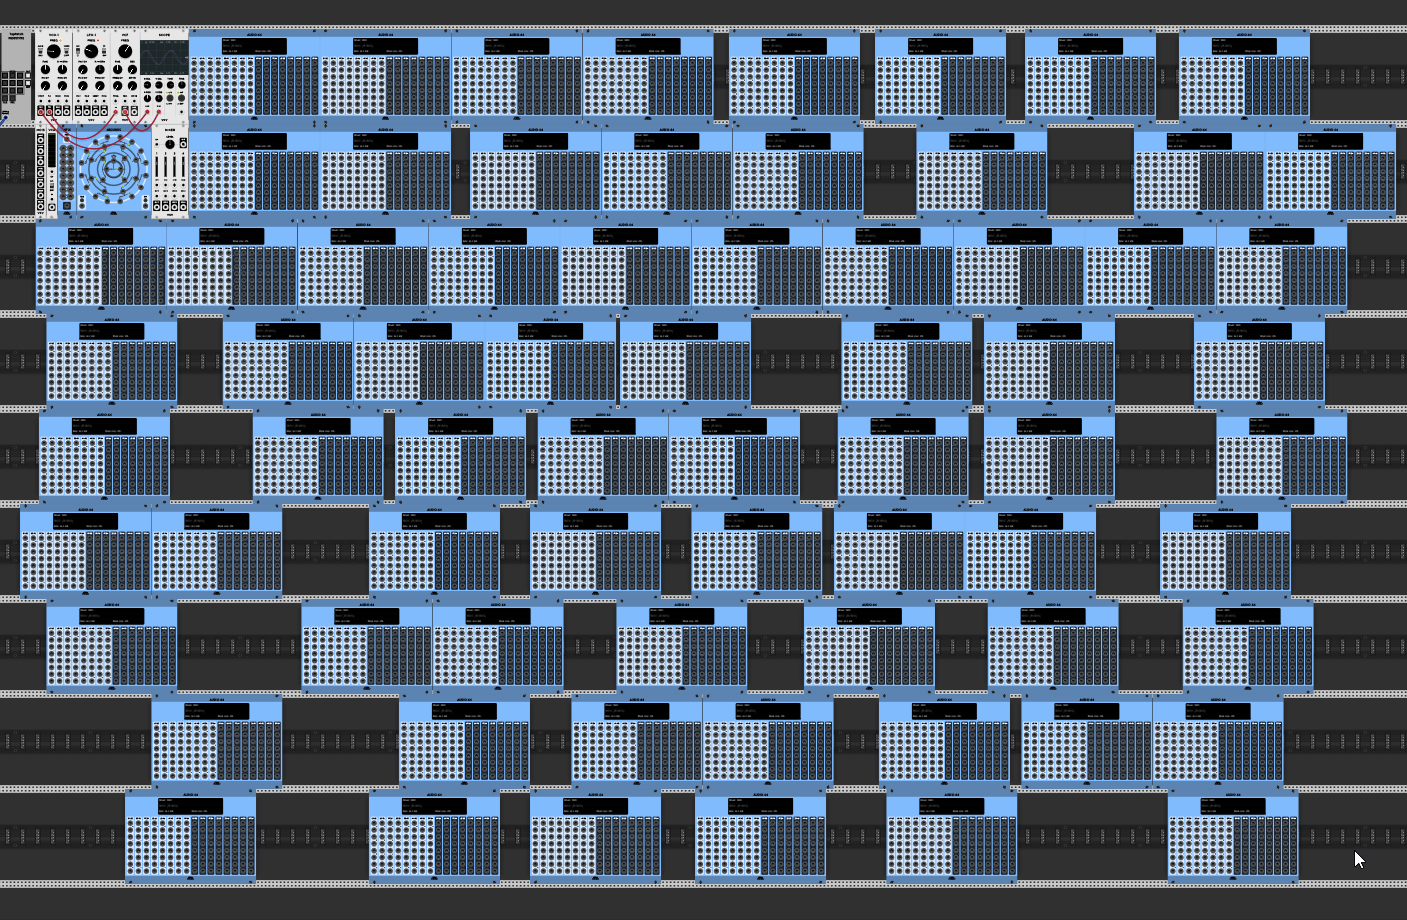
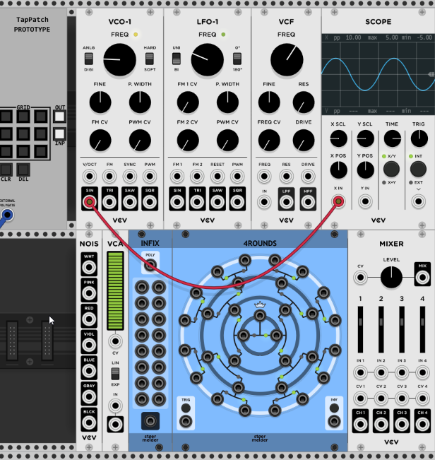
In Port Selection Mode, TapPatch will locate all output ports on your screen and place them into 9 equally sized rectangles, each of which corresponds to a pad on the 3x3 grid. (You can see the squares as thin black lines, which can be customized or turned off). It will then put a marker over each output port indicating which rectangle that port lands in (eight isosceles triangles, pointing outwards, for the outer pads, and a diamond for the inner pad). Each rectangle’s markers have a consistent (but of course customizable) color, and these colors also appear on the 3x3 grid for reference. (The suggested mapping for the 3x3 pad is the upper left corner of a 4x4 controller, or the number keys on a keypad.)
This is a lot of visual information, especially when zoomed out in a large patch, but the combination of positional, directional, and color indication–splitting up by squares, showing markers that point in the direction of the square, and consistently coloring the markers–is designed to let you select ports more and more quickly as you get used to the interface.
Back to the nine rectangles. Recall that, together, they cover all of the output ports on screen. Each of them will contain either no ports (in which case the corresponding pad stays dark and doesn’t do anything), one port (in which case pressing the corresponding pad will immediately select that port), or more than one port. When there is more than one port in a rectangle, pressing the corresponding pad will repeat the selection process for all output ports in that rectangle. This process repeats until either a port is selected or you cancel the process by tapping the [CLR] or [DEL] pads.
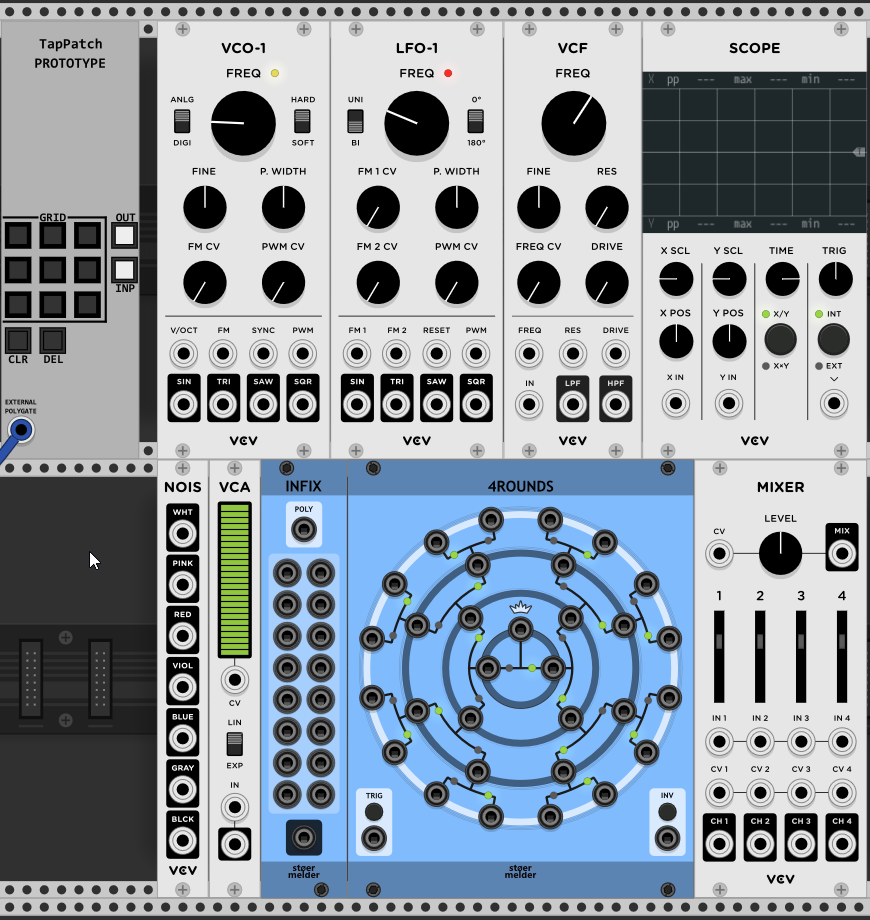
Picking an input port works the same way (and can, of course, be done first). The markers for input ports have the tip of the triangle turned back in, to differentiate them from output ports even when zoomed out. Suggested mapping for the [INP] pad is below the [OUT] pad on a 4x4 controller, or * on a keypad.
Only one more detail (for now) about Port Selection Mode: notice that when pressing a pad will result in selecting a port, both the (single) marker associated with that pad and the representation of the pad on the module will both have a white border. On feedback-capable MIDI controllers with sufficient color support, the color of the pad will be brighter than normal.
There are lots of features, refinements, and customizations planned for Port Selection Mode, but they all build on this basic interaction: drilling down among the onscreen ports until one is selected.
PATCH MODE
Once you leave Port Selection Mode, having either selected a port or cancelled selection, TapPatch goes back into Patch Mode (which is actually where it started). With both ports selected and empty, you will see nine (customizable) colors on the 3x3 pad; pressing any of these will create a new cable of that color between the ports, and reset the [OUT] and [INP] selection to white.
It’s time to discuss the colors of the [OUT] and [INP] pads. As mentioned above, white means void: no port is selected. Green means that a port is selected which has no cables currently attached. For output ports, blue means that one cable is currently attached, and purple means that more than one cable is currently attached. For input ports, orange means that a single cable (the limit for input ports) is currently attached.
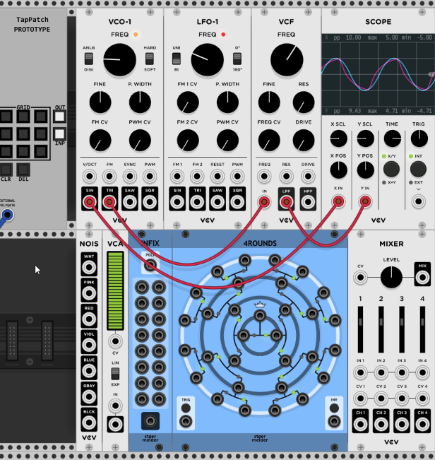
These colors are different, though, if there is already a cable between two selected ports. In this case, the [INP] pad shows red, and the [OUT] pad shows red if that cable is the only connected cable, or magenta if there are also other cables connected.
Notice that TapPatch drops square markers of the same color over the selected ports in the Rack window.
These colors give you a quick indicator of what you can do with your selected ports in Patch Mode. The rules are simple: if Input is green, and Output is green, blue, or purple, tapping on the grid will add a new cable between the ports. If Input is orange, and Output is green, blue, or purple, tapping on the grid will “bump” the existing cable and create a new one (something not yet implemented in the default mouse interface).
Finally, if Input is red and Output is red or magenta, tapping [DEL] will remove the existing cable between the ports.
There are lots of other features planned for Patch Mode, but the basic idea is to give you as much (indeed, more) control over Rack cables from your keyboard or controller as you have with your mouse.