This is a response to my original post seen here:
I’m posting this information because it’s what I would have liked to see. Mainly I was concerned about the connectivity between Abelton and VCV rack and let me just say it’s exceeded my expectations. As a new user of both Ableton and VCV I feel like this gives me a prospective that veteran users may find trivial. My daw background is Reason so I apologize if I swap out descriptive wordage.
Installing and Setup
Step one is to understand the differences between the paid Pro version of VCV Rack 2.0 and the Free version. The free version, I would describe, is more of a ‘stand alone’ rack and the Pro version (because of the VST) integrates into your compatible DAW as a plugin instrument but with similar modular functionality. In other words, how you can work from within the DAW environment drastically changes depending on the version of VCV rack you’re attempting to connect. With the Pro version, you’re getting that easy one click access to multiple patches within Ableton.
The Pro version becomes a download option after you purchase it and is linked to your account. To download the Pro version, click buy and return to this screen for the actual download. you’ll notice how the image changes from displaying a price for pro to now just saying download. (At first I was like but where’s the actual download tho..duhhhh)

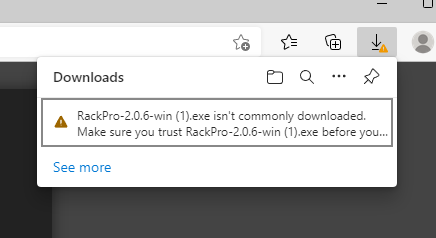
When you click the appropriate button for your operating system this will innitilize a download that may require action from you to complete. as windows defender doesn’t seem to agree with the download, as seen here:

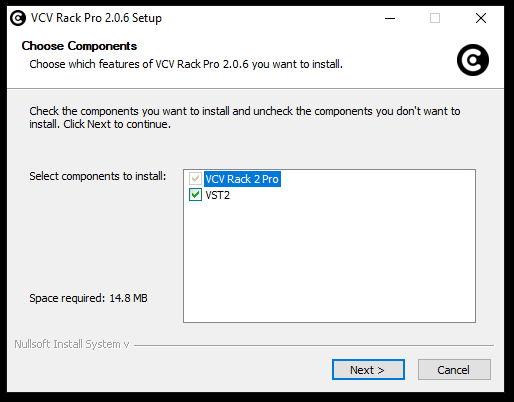
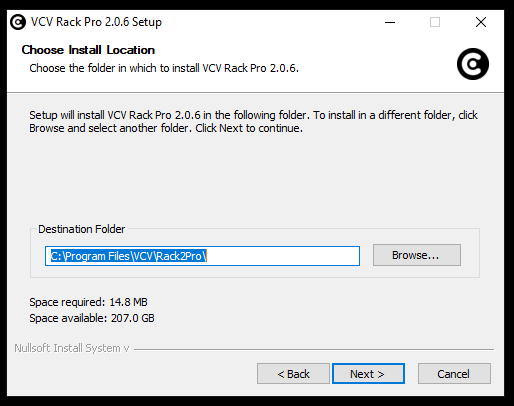
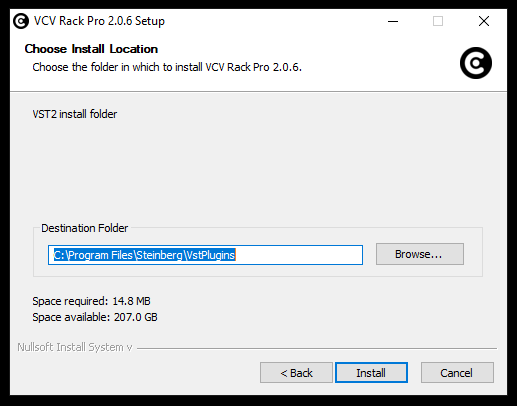
When you Run the installation exe you just downloaded, you select the path for the VST. Pay attention to the VST path and folder name, you’ll need to reference it later on. Below we can see the default paths for VCV and the VST files when running the install file: This is where you get the VST to install into Ableton.
Setting up the VST on Ableton 11
Now, inside Ableton, navigate to the Preferences window ( Option tab > Preferences )
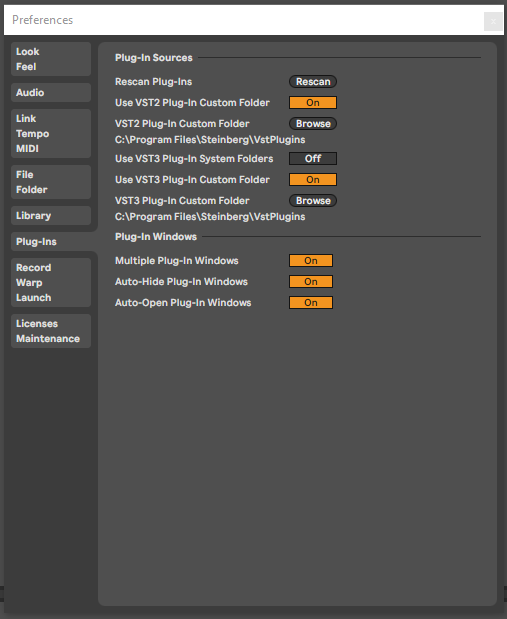
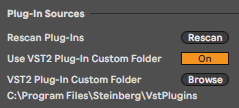
The folder that Ableton looks inside for the VST files needs to be set to the folder that contains the VCV Rack VST files that we installed. (remember that file location from before?)
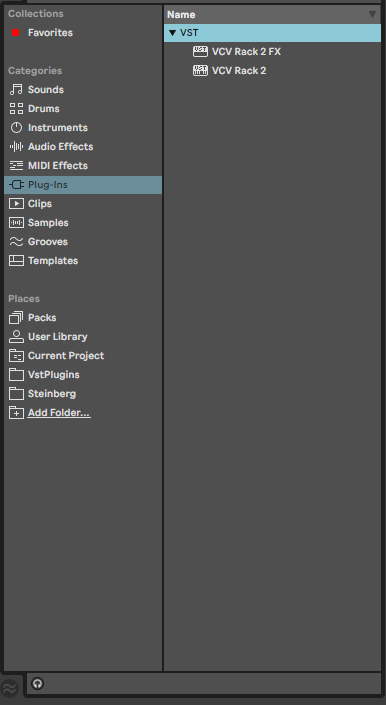
Now, we can see that the VCV Rack 2 FX and VCV Rack 2 VSTs are now alliable from the plugins categories inside Ableton 11. When you double click (VCV Rack2 recommended for most things) this adds a rack instrument to your selected track.
Notice how Rack opens up in it’s own window just like free rack but the i/o is automatically set to DAW communication.
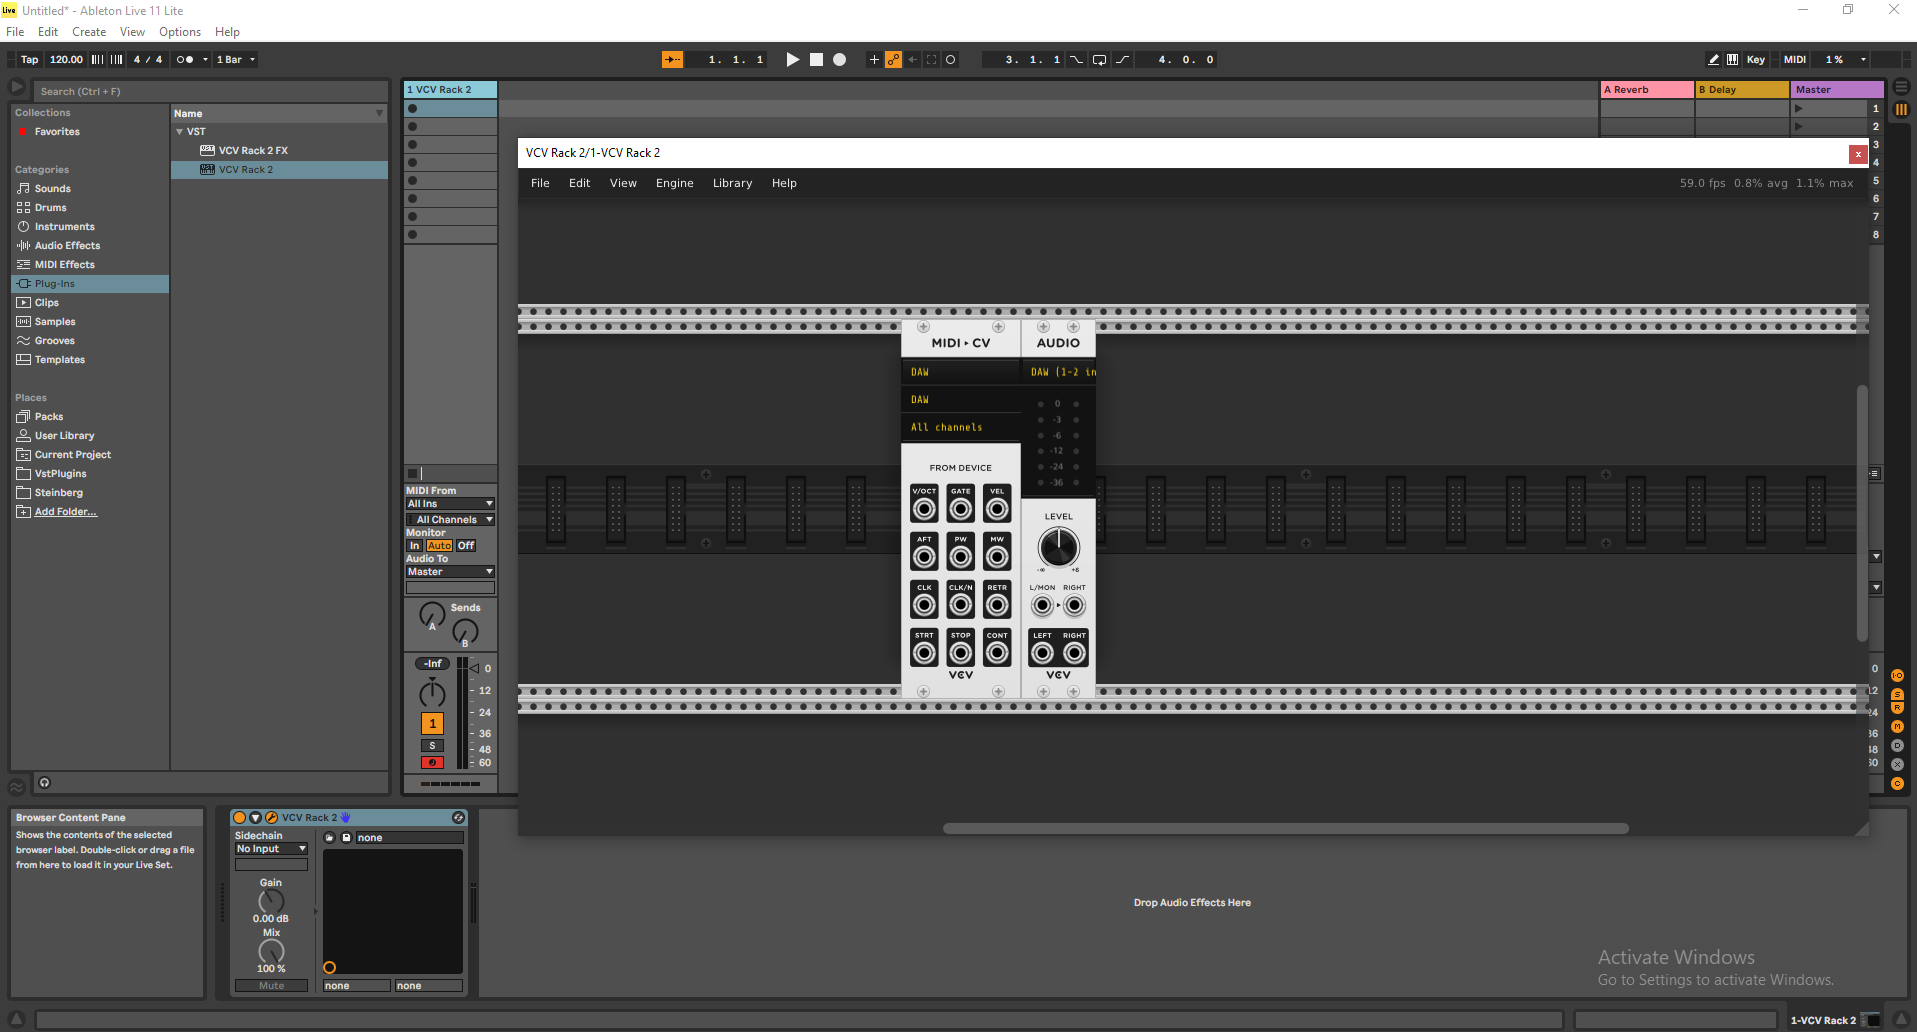
All the fundamental i/o units now have a DAW option to communicate everything to and from Ableton and it’s contained within each track.

At this point, you can do whatever you want and it’s up to you to decide how you want to route your signals. Maybe you want a sequencer inside rack to play a Ableton instrument, or you want to record midi notes and gates and send them to rack for sound generation and back out to Ableton for effects and final mixing. you’re imagination is the limit here.
(having more then 1 audio i/o module can glicth inside Ableton for me causing things not to work so watch out for that)
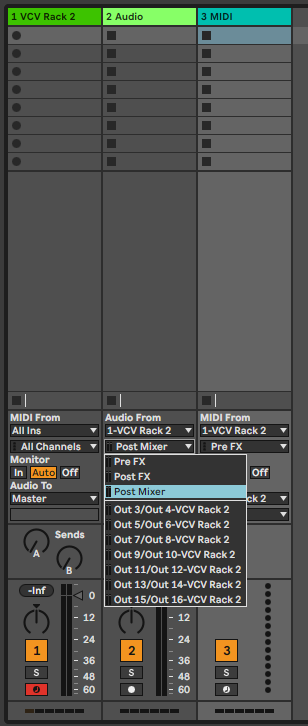
We now can set all out i/o inside Ableton:
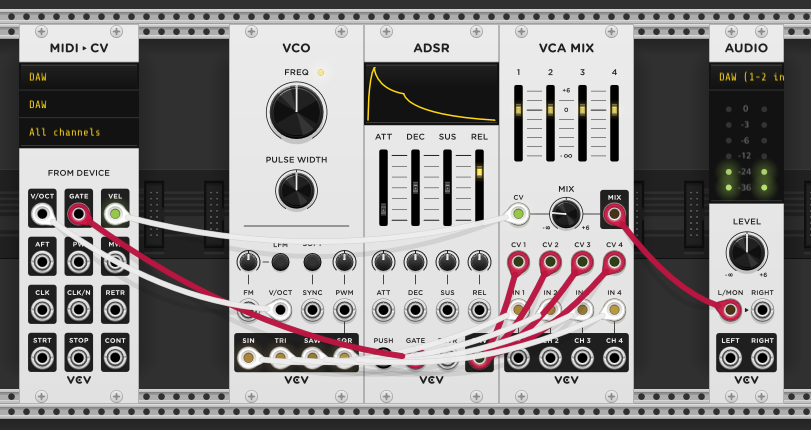
Here’s the standard basic one osc synth being played from abelton:
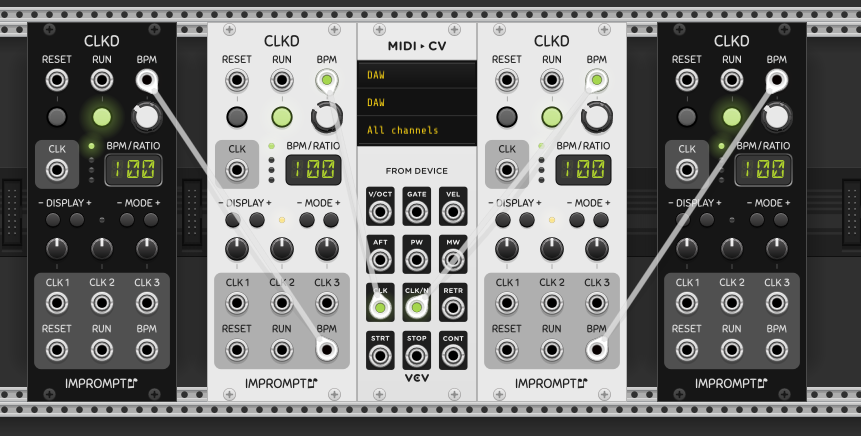
Clock Signals
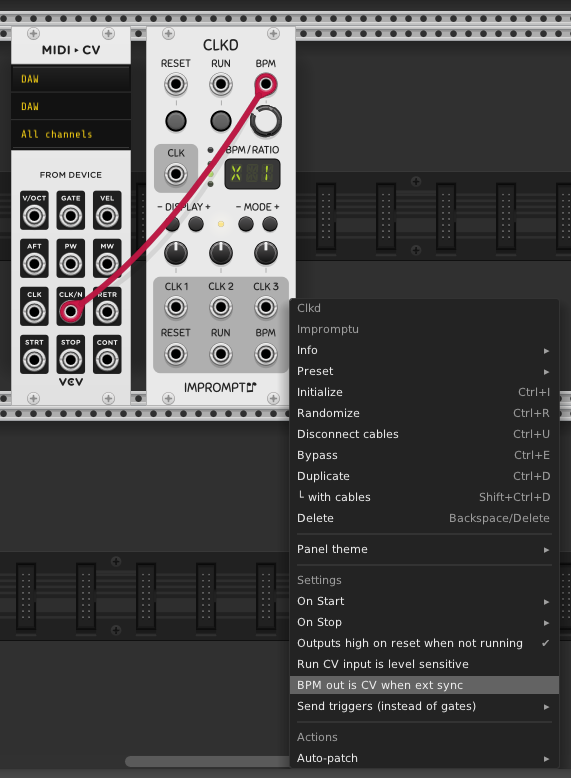
You get accurate enough clock synchronization using the Midi to CV fundamental module . Use the Cock divider output and set it with the right click menu to 24ppqn. (note that the regular CLK outputs 24ppqn by default)
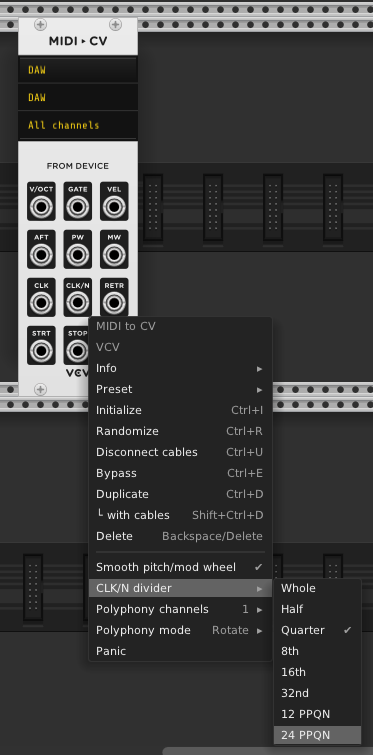
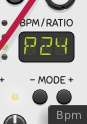
Then set CLKD to take the 24ppqn pluse and transpose it to BMP by selected the P24 Mode.
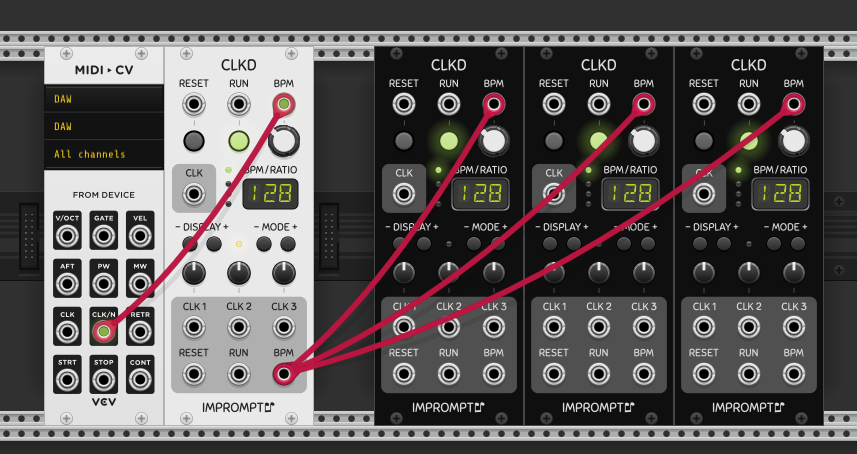
Now if you want you can change the BPM out of CLKD to send CV so that you can link up other modules to the BPM output.
Now everything can be synced to the tempo of Ableton when you press play on the timeline. No need to fuss around using audio ticks or anything like that.
Well that’s about it for the basic stuff. let me know if you have a specific question or what not.
take it easy guys!