Hi, I have decided to tip my toe on the plugin development pool and I’m trying to set up my build environment. So far I have managed to build the Fundamental modules and load them into VCV Rack and use them. So far so good!
I’m using VS Code as my IDE, and I’m trying to set up tasks so that when I build the module, they will be automatically copied into plugin folder. In the guide from the Medium, the author creates two tasks, one for the build/copy, and one for the cleanup. Both works just fine, only problem is that only the ‘.vcvplugin’ plugin file is copied into plugin folder - the actual dll is missing.
I investigated the makefile, that was created by the helper.py, and noticed these two files on tope of the file:
# If RACK_DIR is not defined when calling the Makefile, default to two directories above
RACK_DIR ?= ../..
To make life a bit harder, my plugin folder is located on a non standard location, so I need to somehow specify the location where the files should be copied.
Few questions: what are the directories mentioned in the makefile? And what kind of build tasks you use in VS Code to aid your plugin development?
More questions will be posted when I manage to set-up everything and start the actual development!
It’s fine to just copy the .vcvplugin file that results from running make dist or make install. The plugin.dll is inside it and gets unpacked when Rack runs. These commands will work properly out-of-the-box for your custom user folder when you set the appropriate environment variables.
You may also set the RACK_SYSTEM_DIR or RACK_USER_DIR environment variables to override these locations.
I used to build from VSCode, but I don’t anymore (only debug). Now I just build from a MINGW64 console (in Windows Terminal). I also have MINGW terminal inside VSCode and sometimes build from there.
I don’t use the SDK. I build/run from a clone of the Rack source, in this setup there’s no need for doing a make install or creating or copying the .vcvplugin to your retail Rack install – it is built in-place and ready to run.
VCV Rack’s plugin.mk supports RACK_USER_DIR, so if the environment variable is set, make install will build, package, and install your plugin in your specified location. RACK_DIR should point to the extracted Rack SDK folder.
Be wary of third-party instructions, as they may be incorrect, misleading, or out of date. If VCV’s instructions aren’t working for you, contact VCV Support so we can assist you or fix our documentation.
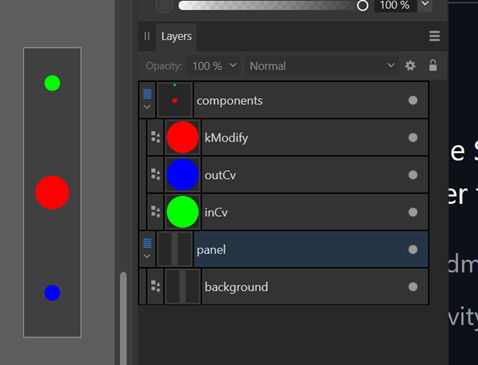
Found 0 params, 0 inputs, 0 outputs, 0 lights, and 0 custom widgets in "components" layer.
I found this one related to using AD as a UI designer for VCV Rack panels https://github.com/modlfo/FixAffinitySVG but that page is pretty old and I thought that doesn’t matter anymore
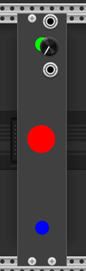
When I load my plugin in VCV Rack, it looks like this:
I’m also using Affinity Designer for creating my panels, I don’t have to change anything in the exported SVG files.
What size did you specify for your document in Designer? All my panel designs have a height of 380px and a width of 15px per HP (i.e. per “screw hole”). So a panel of 3 wide would be 45px. If I try to use your svg file directly in my plugin, it also doesn’t show a UI, but if I open the svg file in designer and change the document size to 45x380px in File → Document Setup and export it again, it does show the UI as a 3HP wide panel
@not-things I changed the document units to pixels but that didn’t help. Well it helped a bit but now I’m getting errors from the helper.py when it tries to parse the file. Any chance if you could open the AD file on your AD and see if you can see what is going on? Remove the ‘.txt’ extension!
When I run helper.py against the exported SVG, I’m getting following errors:
$ helper.py createmodule Test res/test.svg src/test.cpp
Module Test already exists in plugin.json. Edit this file to modify the module manifest.
src/test.cpp already exists. Overwrite? (y/n) [n]: y
Traceback (most recent call last):
  File "/d/msys64/home/kila/Rack-SDK/helper.py", line 610, in <module>
    parse_args(sys.argv)
  File "/d/msys64/home/kila/Rack-SDK/helper.py", line 601, in parse_args
    create_module(*args)
  File "/d/msys64/home/kila/Rack-SDK/helper.py", line 251, in create_module
    components = panel_to_components(tree)
                 ^^^^^^^^^^^^^^^^^^^^^^^^^
  File "/d/msys64/home/kila/Rack-SDK/helper.py", line 379, in panel_to_components
    color = color_match.group(1)
            ^^^^^^^^^^^^^^^^^
AttributeError: 'NoneType' object has no attribute 'group'
Here is the SVG:
@Ahornberg Reason for the ‘empty’ file was that items on the “components” layer were marked as hidden. Now that they are visible, they are included int the SVG.
A small adaption is needed in the script:
the helper.py accepts both “#00f” and “#0000ff” as color values for a fill attribute, but for a style attribute with a fill inside it, it only checks for “#0000ff” (or similarly formatted color).
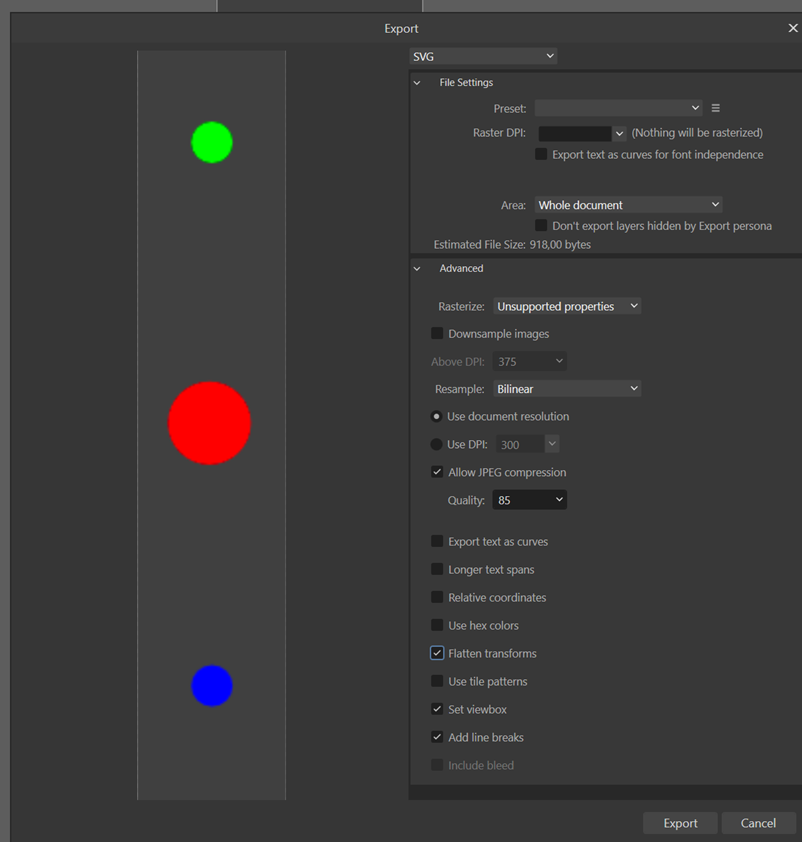
If you update re.search(r'fill:\S*(#[0-9a-fA-F]{6})', style) on line 378 in helper.py to re.search(r'fill:\S*(#(?:[0-9a-fA-F]{3}){1,2})', style), it will accept both the 3 and 6 character color values. And make sure you check the “Use hex colours” option in the SVG export dialog in Affinity Designer.
IMO Helper.py is unsustainable. When it works, it’s only usable as an initial bootstrap and shouldn’t be used once your module is running. Depending on your SVG tool, it’s easy to get an SVG that helper.py is broken for. IIRC it doesn’t understand transforms, which are very commonly added by svg editors whenever you move something. The whole Rack tutorial leads you into traps that you cannot sustain as you iterate.
Better to start from an already clean, building, and loading module (e.g. use my GenericBlank template repo).
I already sent an email to the support address after replying here with a suggested change for the helper.py script so that it also accept the Affinity Designer SVG export
When I’m a little more familiar with everything, I intend to do all the code manually and skip the “helper.py” altogether if possible. But at the moment there are just too many moving parts, and I’m just trying to create some kind of prototype and learn all the functions needed to create the interface, and what are the “correct” sizes of the elements, and “helper.py” is great for that.
In the SVG file, if you update the width="100%" and height="100%" on the root element to width="75" and height="380" (the same values as used in the viewBox), the helper.py script should be able to determine the positions correctly.
The helper.py script expects the width and height in either pixels or mm, and unfortunately, it is not possible to instruct Affinity Designer to export in px and also keep the viewBox (which is also needed by helper.py). This is only needed while using the script to generate the code. Once you’re comfortable changing the code directly yourself, you won’t have to update the SVG anymore.
There is a proverb in the Finnish language - Ei ole lahjahevosen suuhun katsomista - which freely translates to “Don’t look into the mouth of a gift horse”, i.e., if you get something for free, don’t whine. Or something like that.
I installed Inkscape… and then I removed it. Using it after Affinity Designer is a bit too harsh a punishment IMO.
I probably need to write a small script or console application that processes the SVG file so that I don’t have to remember to do it manually after each edit.