We are always getting in trouble for making fun of other people’s plugins, so for a change we are going to make fun of our own.
Now we aren’t the only ones with this problem, but our sawtooth output has some DC mixed in, and this can be noticeable when you control the amplitude with a fast envelope. It will make clicks and pops.
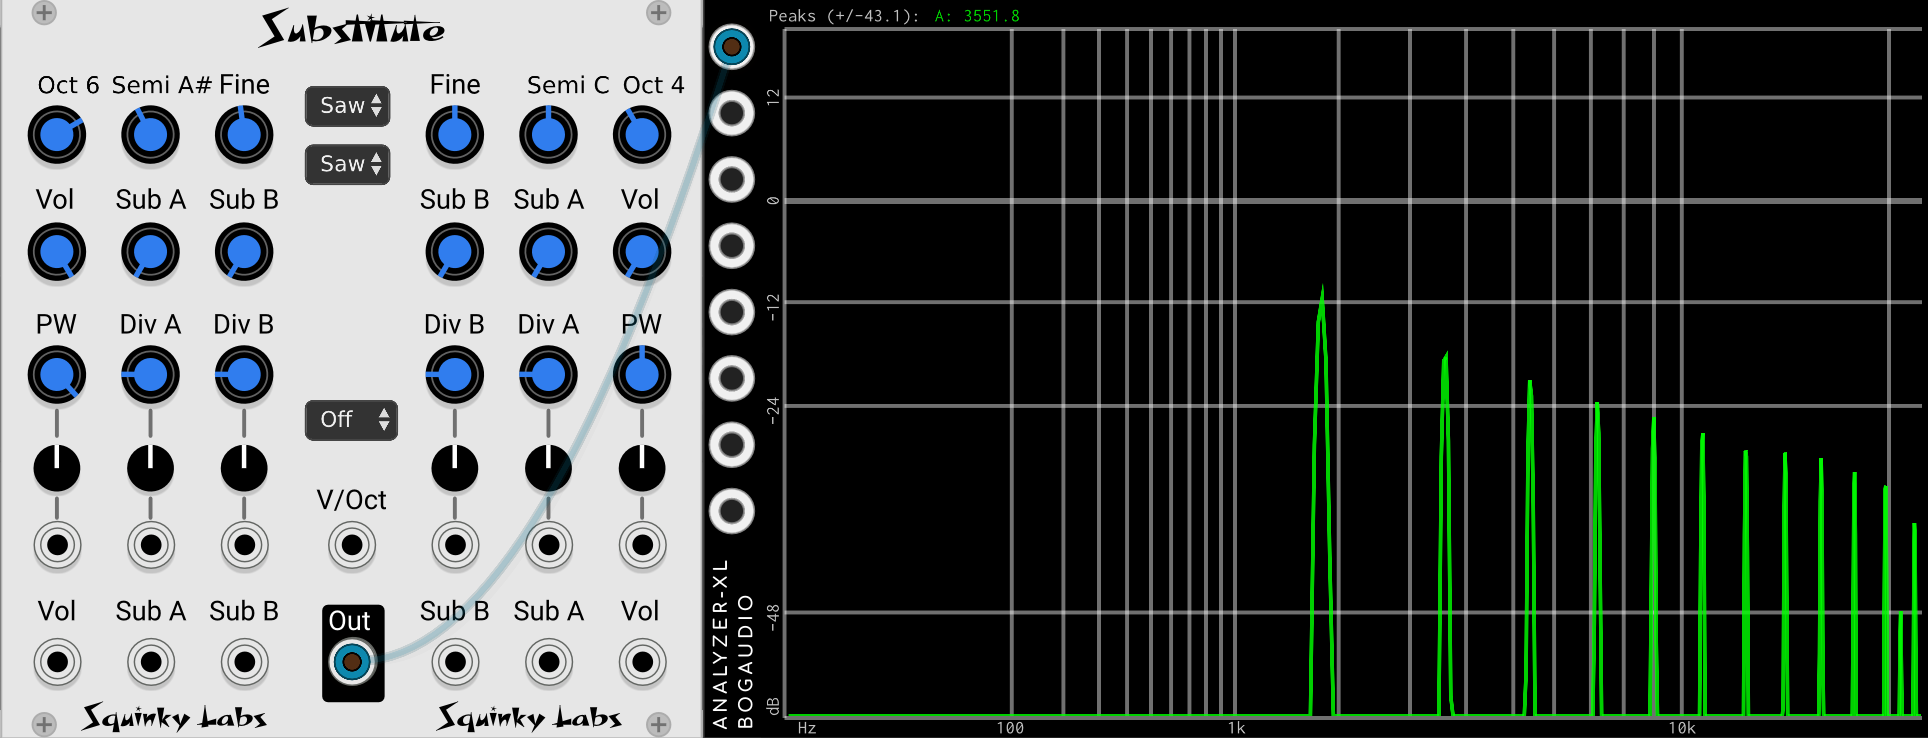
It turns out that many sawtooths that use MinBLEP to get rid of the aliasing pick up this DC offset in return. This illustration is kind of a worst case - the DC level goes down as the frequency goes down. See that big hump on the left of the analyzer? That’s DC, and here there is a much DC as signal. This it the version of our Substitue VCO that is in the plugin manager now (1.0.9):
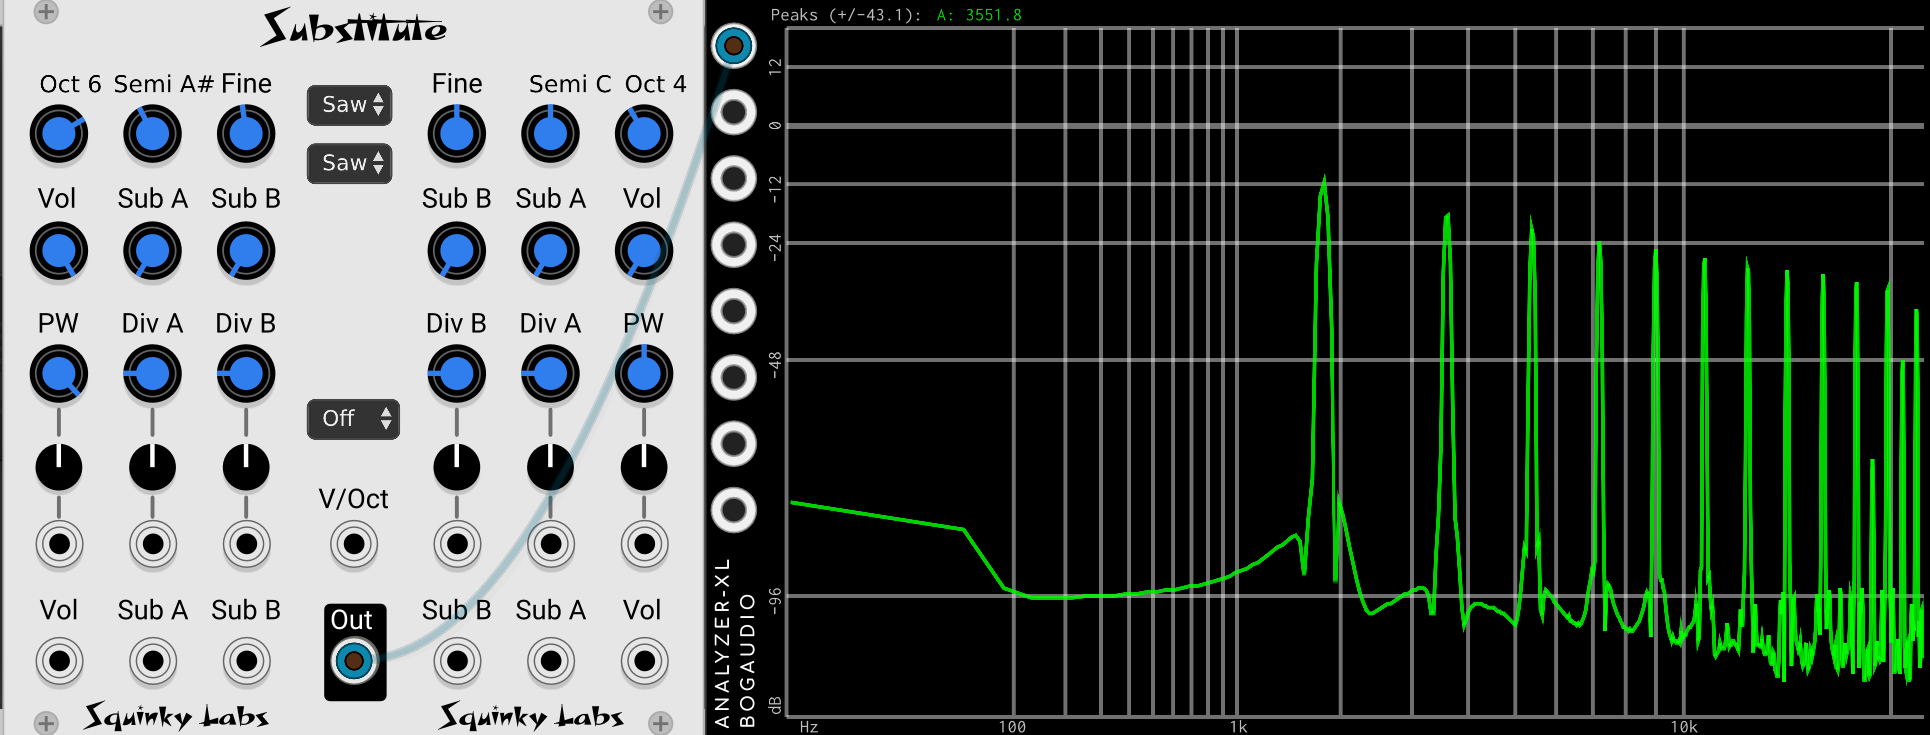
For pulse waves MinBLEP is super accurate. But there is a different cause of DC in pulse waves. Just due to simple math many of them get more and more DC the farther they are from square. Again, checkout substitute to see the bad DC in action:
Now, as we said, we aren’t the only VCO by any means with this issue. There are tons of VCOs that have an enormous amount of aliasing distortion - these ones won’t usually have DC on their saws. But of the ones that don’t alias, many of them have this problem.
We will try to get this fixed up ASAP and get a new version in the plugin manager with no DC.
So, I’ve been following this thread and trying to figure out how to read the anylizer output and, frankly, I have no idea. What should I be looking for?
I should update our doc on how to make a VCO and how to analyze. With an analyzer the “x-axis” is frequency, and the “y-axis” is volume. All the way at the left is DC. So in the top (bad) examples you see a lot of DC, then you see individual peaks for the desired waveforms + harmonics. The DC on the pulse is so strong you can see it on a scope, You could also see the waveform shift on the scope with sawtooth as the frequency gets really high. Of course you can’t see this on Substitute any longer if you update to 1.0.10. (no scope pictures included - experiment to try at home).
For the DC, @LarsBjerregaard has a setup he uses to evaluate this, since he’s quite picky about his sound. I believe his test is mostly listening with fast envelopes.
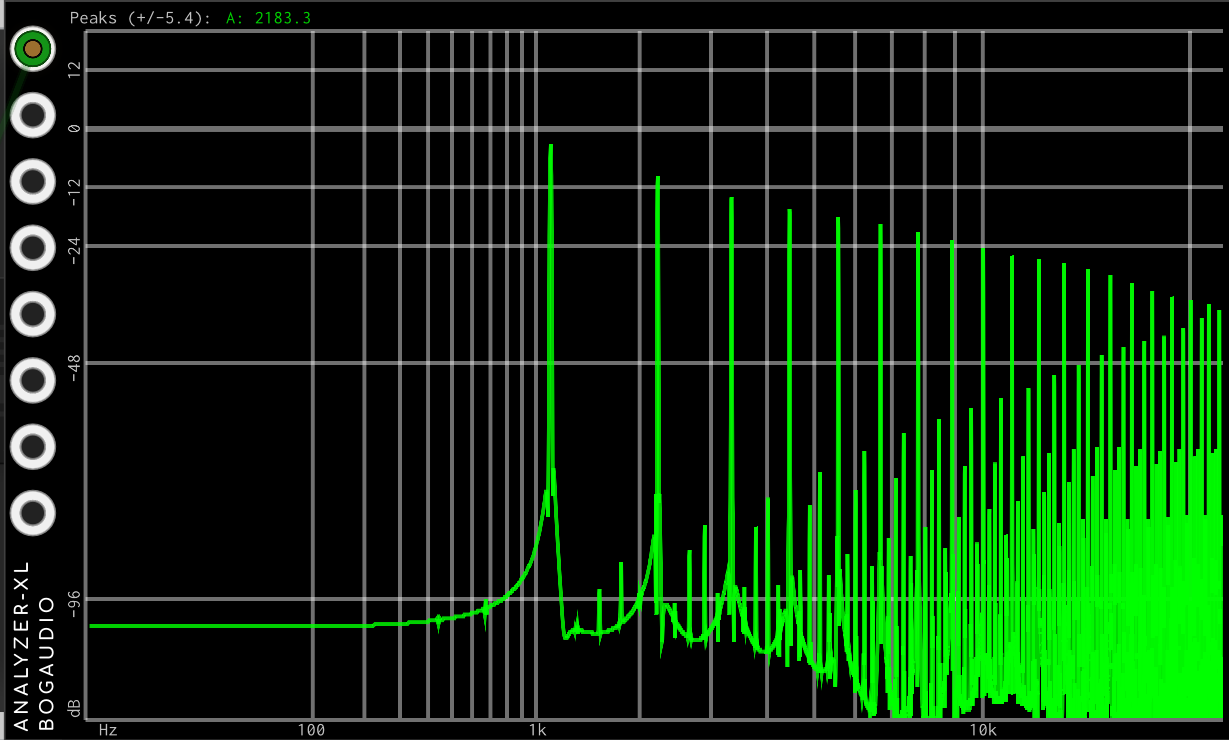
If you mean the line very close to the right edge around 20kHz, yes, that’s exactly what that is, it’s the remaining aliasing not removed by the MinBLEP algorithm. Actually if you turn the range up to 120 db on the analyzer you can see the aliasing falling off as expected, and (hopefully) inaudible:
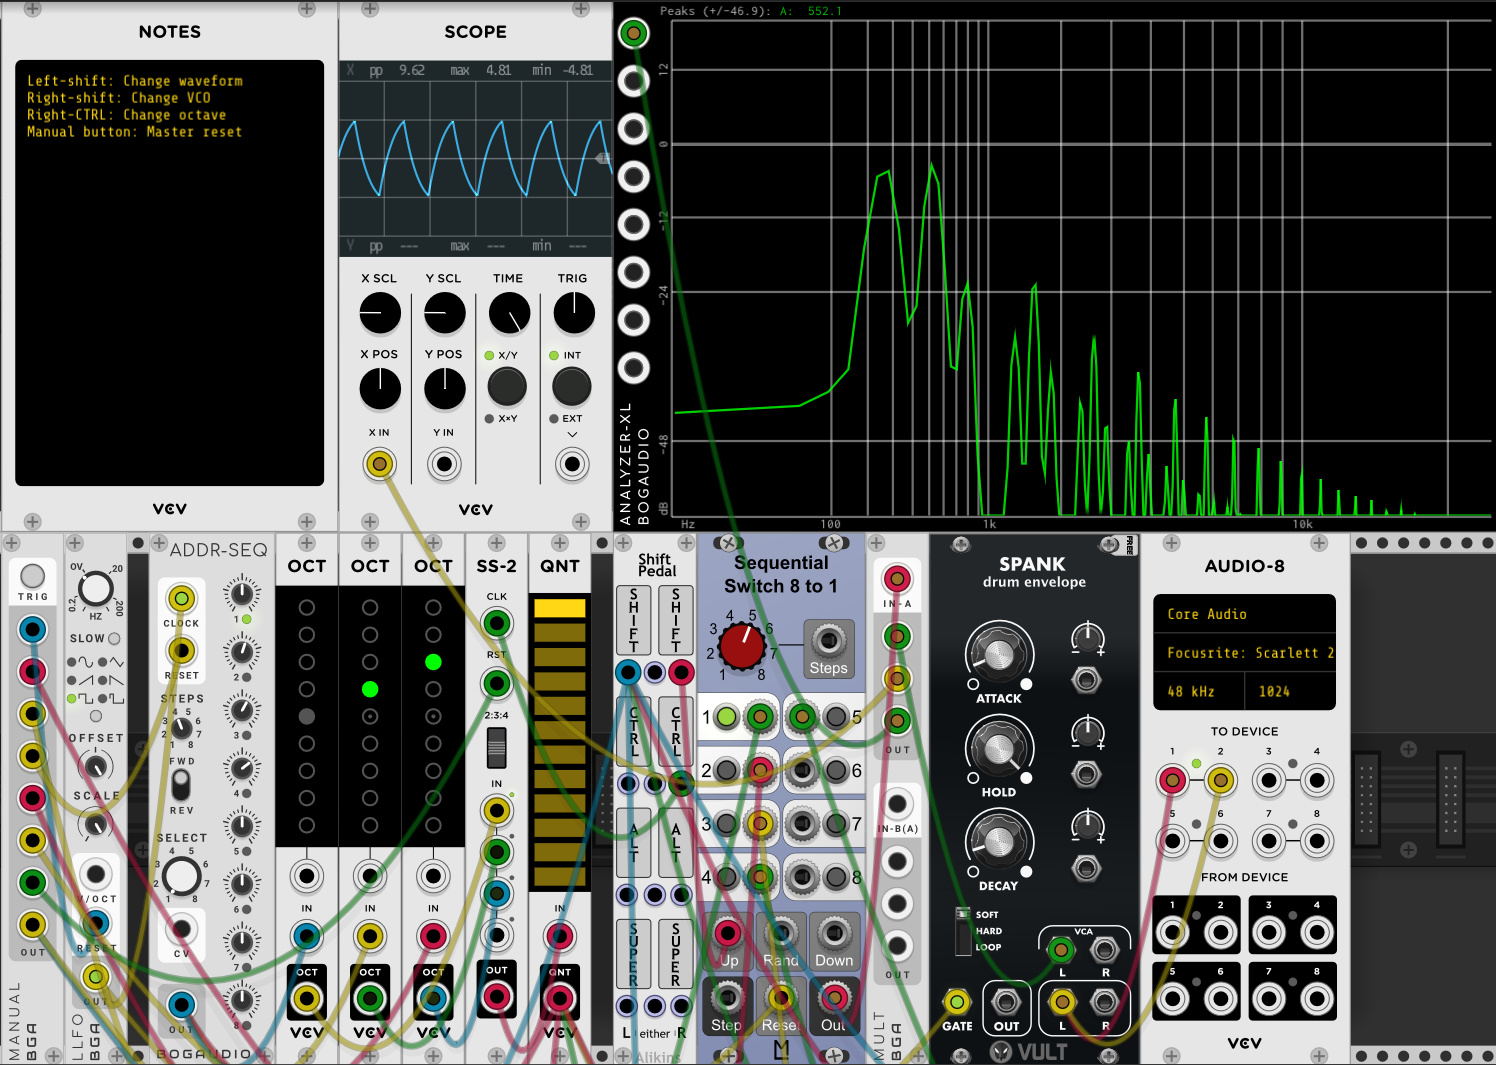
I’m happy to share it and have cleaned it up and attached it here: Basic VCO test.vcv (21.8 KB). It’s a little “Basic VCO test-bench”, for comparing and testing the sound and looks of the 4 basic waveforms from basic VCO’s.
I selected a medium envelope, that allows for both seing and hearing DC offset and aliasing, and at the same time does not give you hearing fatigue, so you can listen for a good period.
It basically allows you to plug in up to 8 VCO’s, and comparing them across waveforms and 3 octaves. Right now there’s 5 VCO’s plugged in, and you can just replace any one with another one, or plug in additional ones by copying the connections and bumping the central sequential swith one max. step up. Should be easy enough to do.
Each press of left-SHIFT on your keyboard cycles to the next waveform. Each press of right-SHIFT cycles to the next VCO. Each press of right-CTRL changes the octave. In this way you can perform the comparison between the VCO’s by cycling between them on a give waveform, or focus on looking at one VCO, across its waveforms and different octaves.