Previously I posted this thread:
https://community.vcvrack.com/t/dant-chromakey-obs-how-to-greenscreen/
However, as I mentioned here, I have recently moved to Davinci Resolve.
The process to achieve a chromakey effect in Resolve is quite different to Premier, but still quite easy once you know how.
-
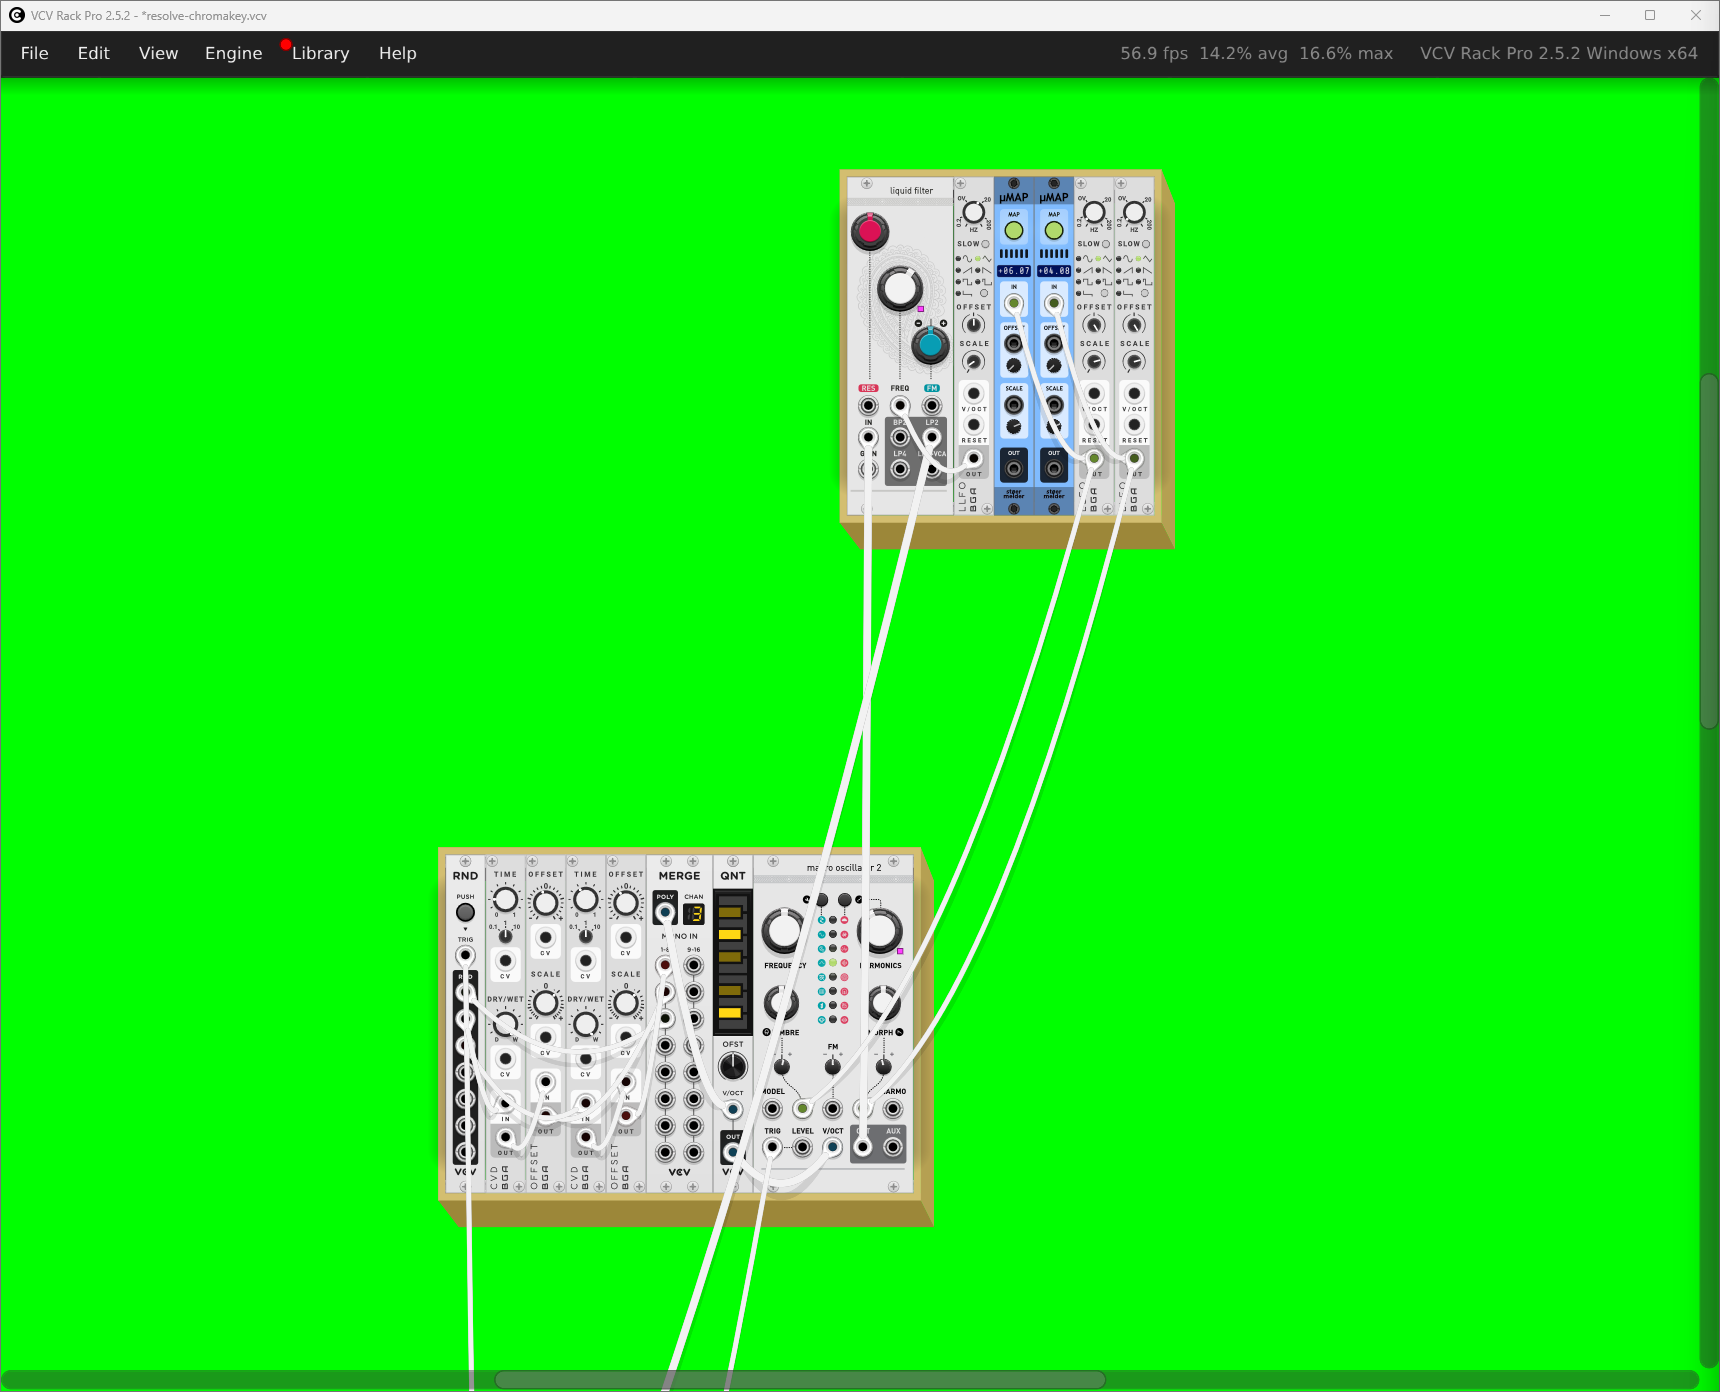
First task is to setup a patch in VCV that includes a module that can display a solid block of colour. There are a few to choose from, for example Greenscreen by Questionable Modules, or my Chromakey module, or Null by pachde.
-
For this example here, I am using my Purfenator module to make the whole of the background a pure green but retain shadows from modules and cables. Using Purfenator you could also overlay an image on top of the greenscreen. Note also that the colour does not need to be green, any colour will work, it is best to select a colour that is least represented by other elements in the patch.
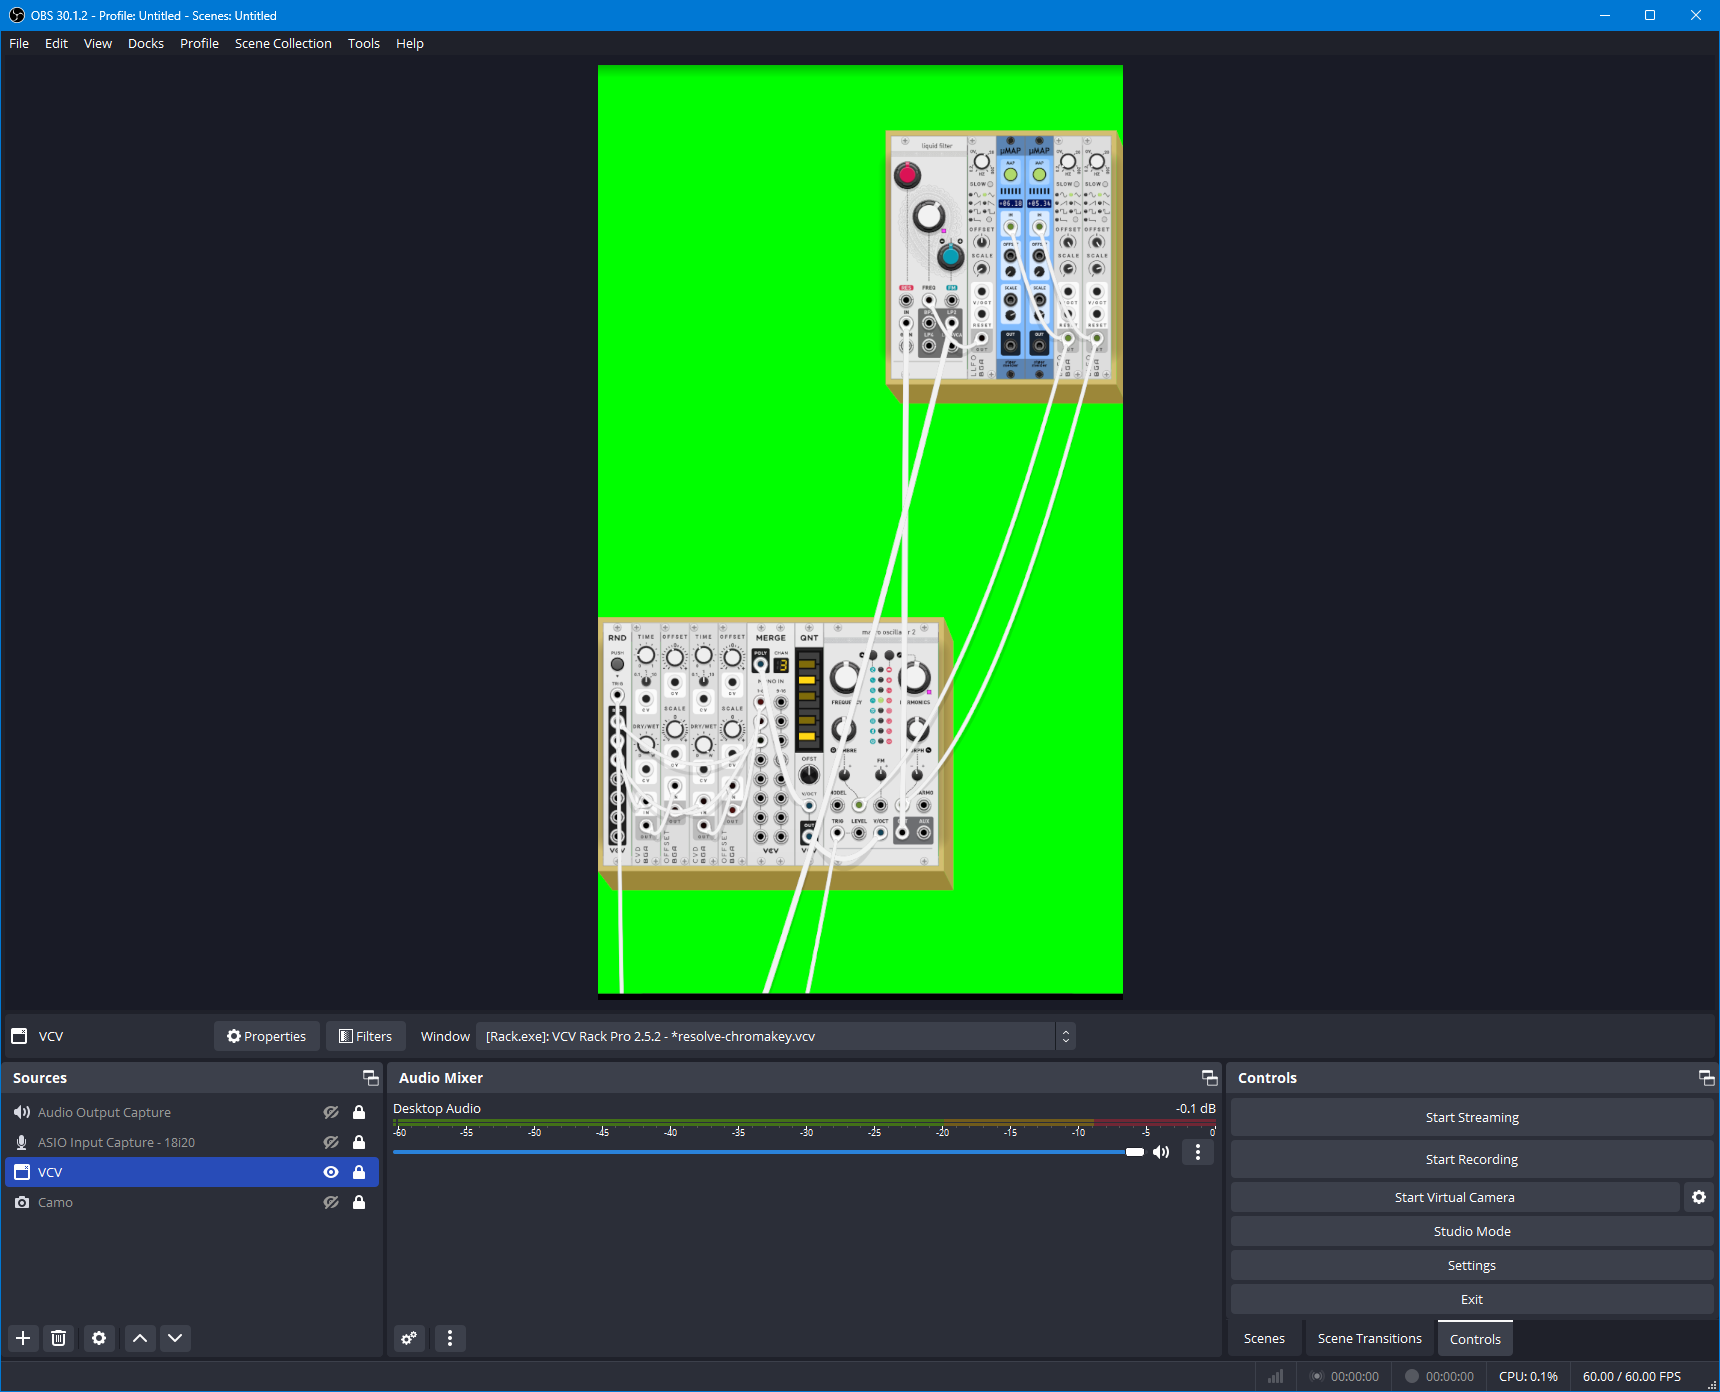
- Next you need to record a video, whilst you can use the VCV Recorder module, I personally find it much easier to use OBS Studio to create a video, and it has the flexibility to add other elements at record time, such as a voice-over or logo. For this example I have also changed the settings to record in
1080x1920for instagram.
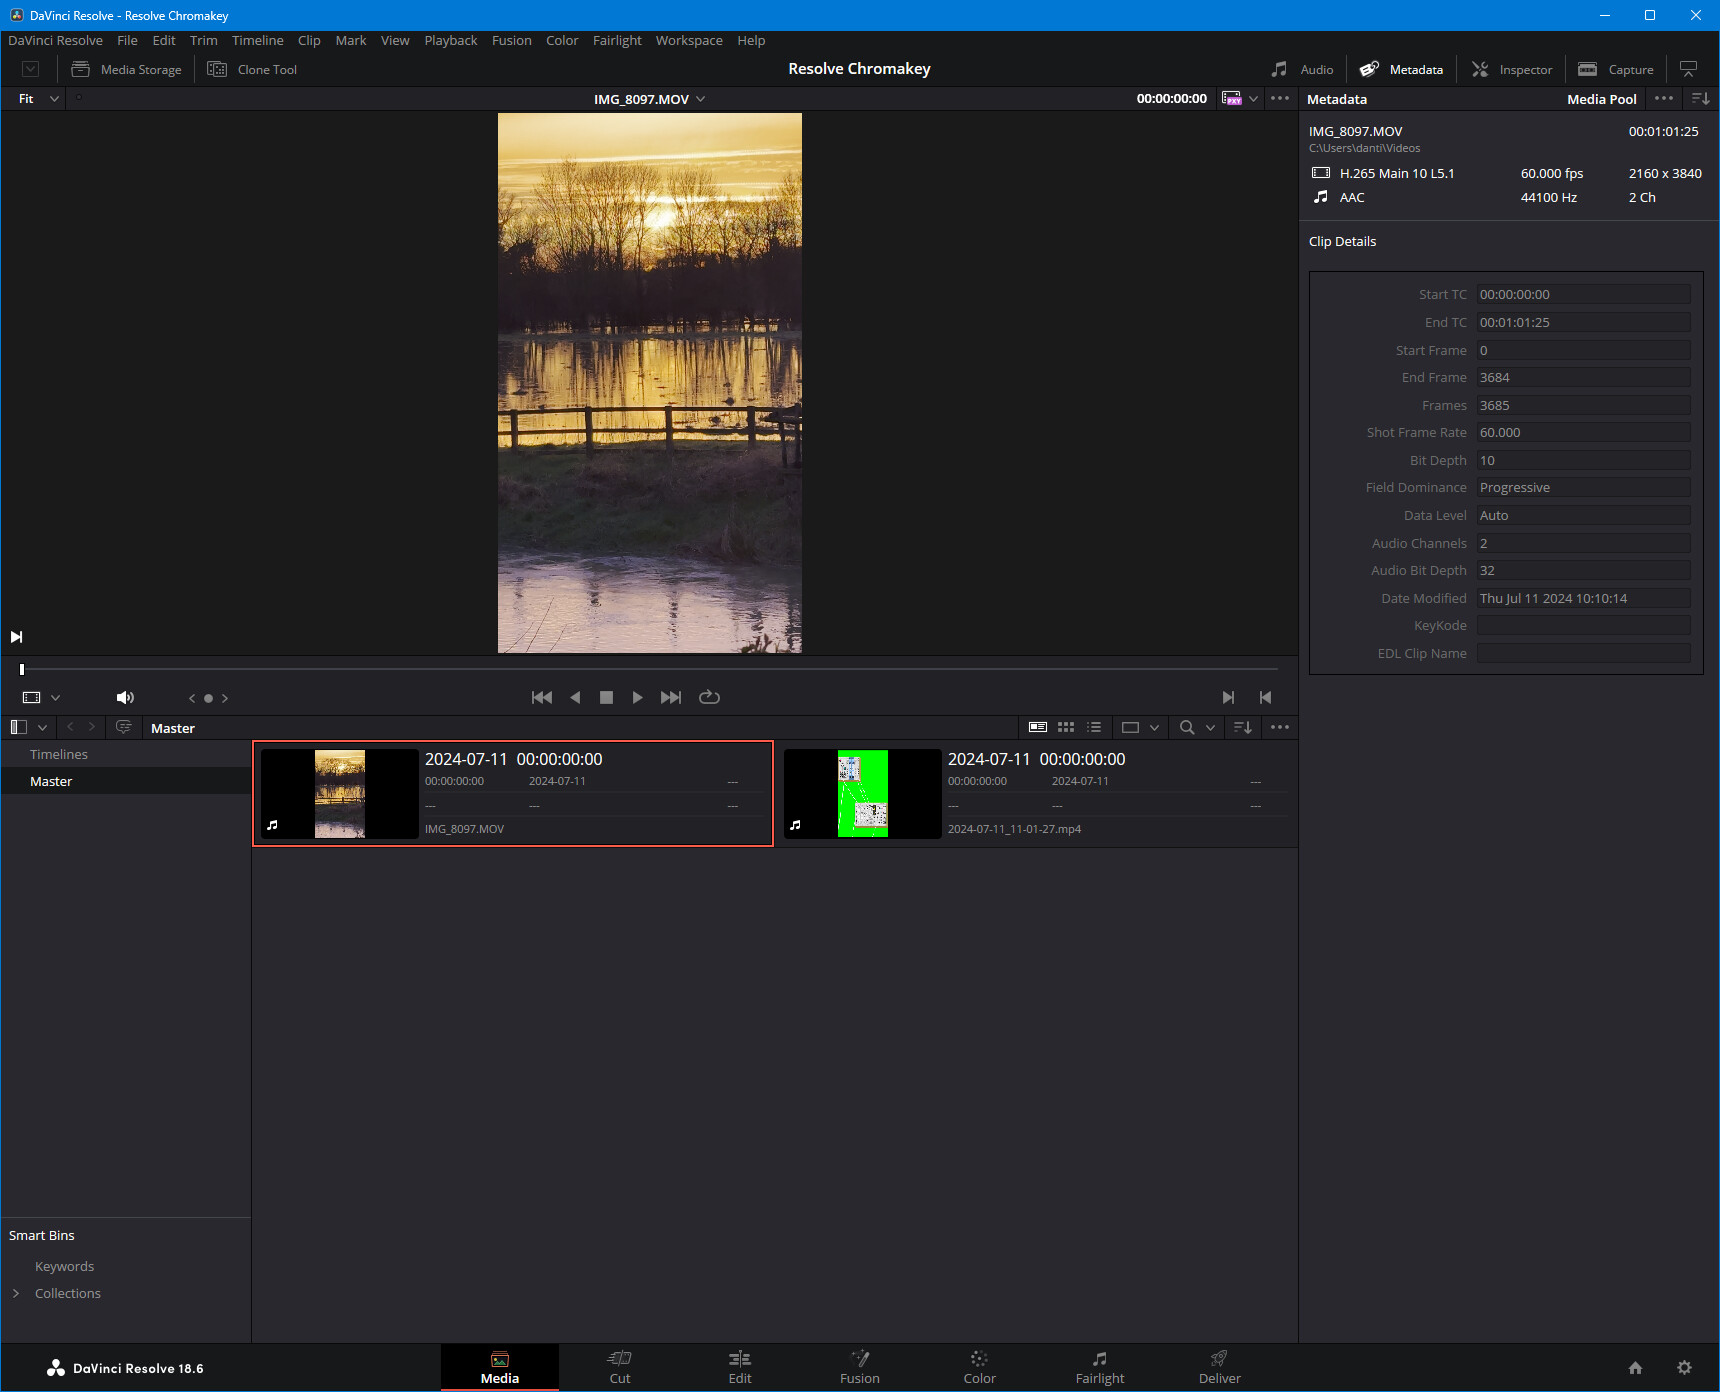
- For this example I will be using a video I recorded when the field opposite where I live flooded back in February. You don’t have to use a video, it could be a static image, or some other asset in Resolve. But if you do use a video, check the frame rates match before you import them onto the same timeline. Fortunately for me both my OBS recording and my iPhone video are
60fps, as you can see on the Media tab.
- You will want to get both your videos onto a timeline with the VCV one on top, this is so that when you make the colour transparent, the video below shows through. This can be done on the Cut tab.
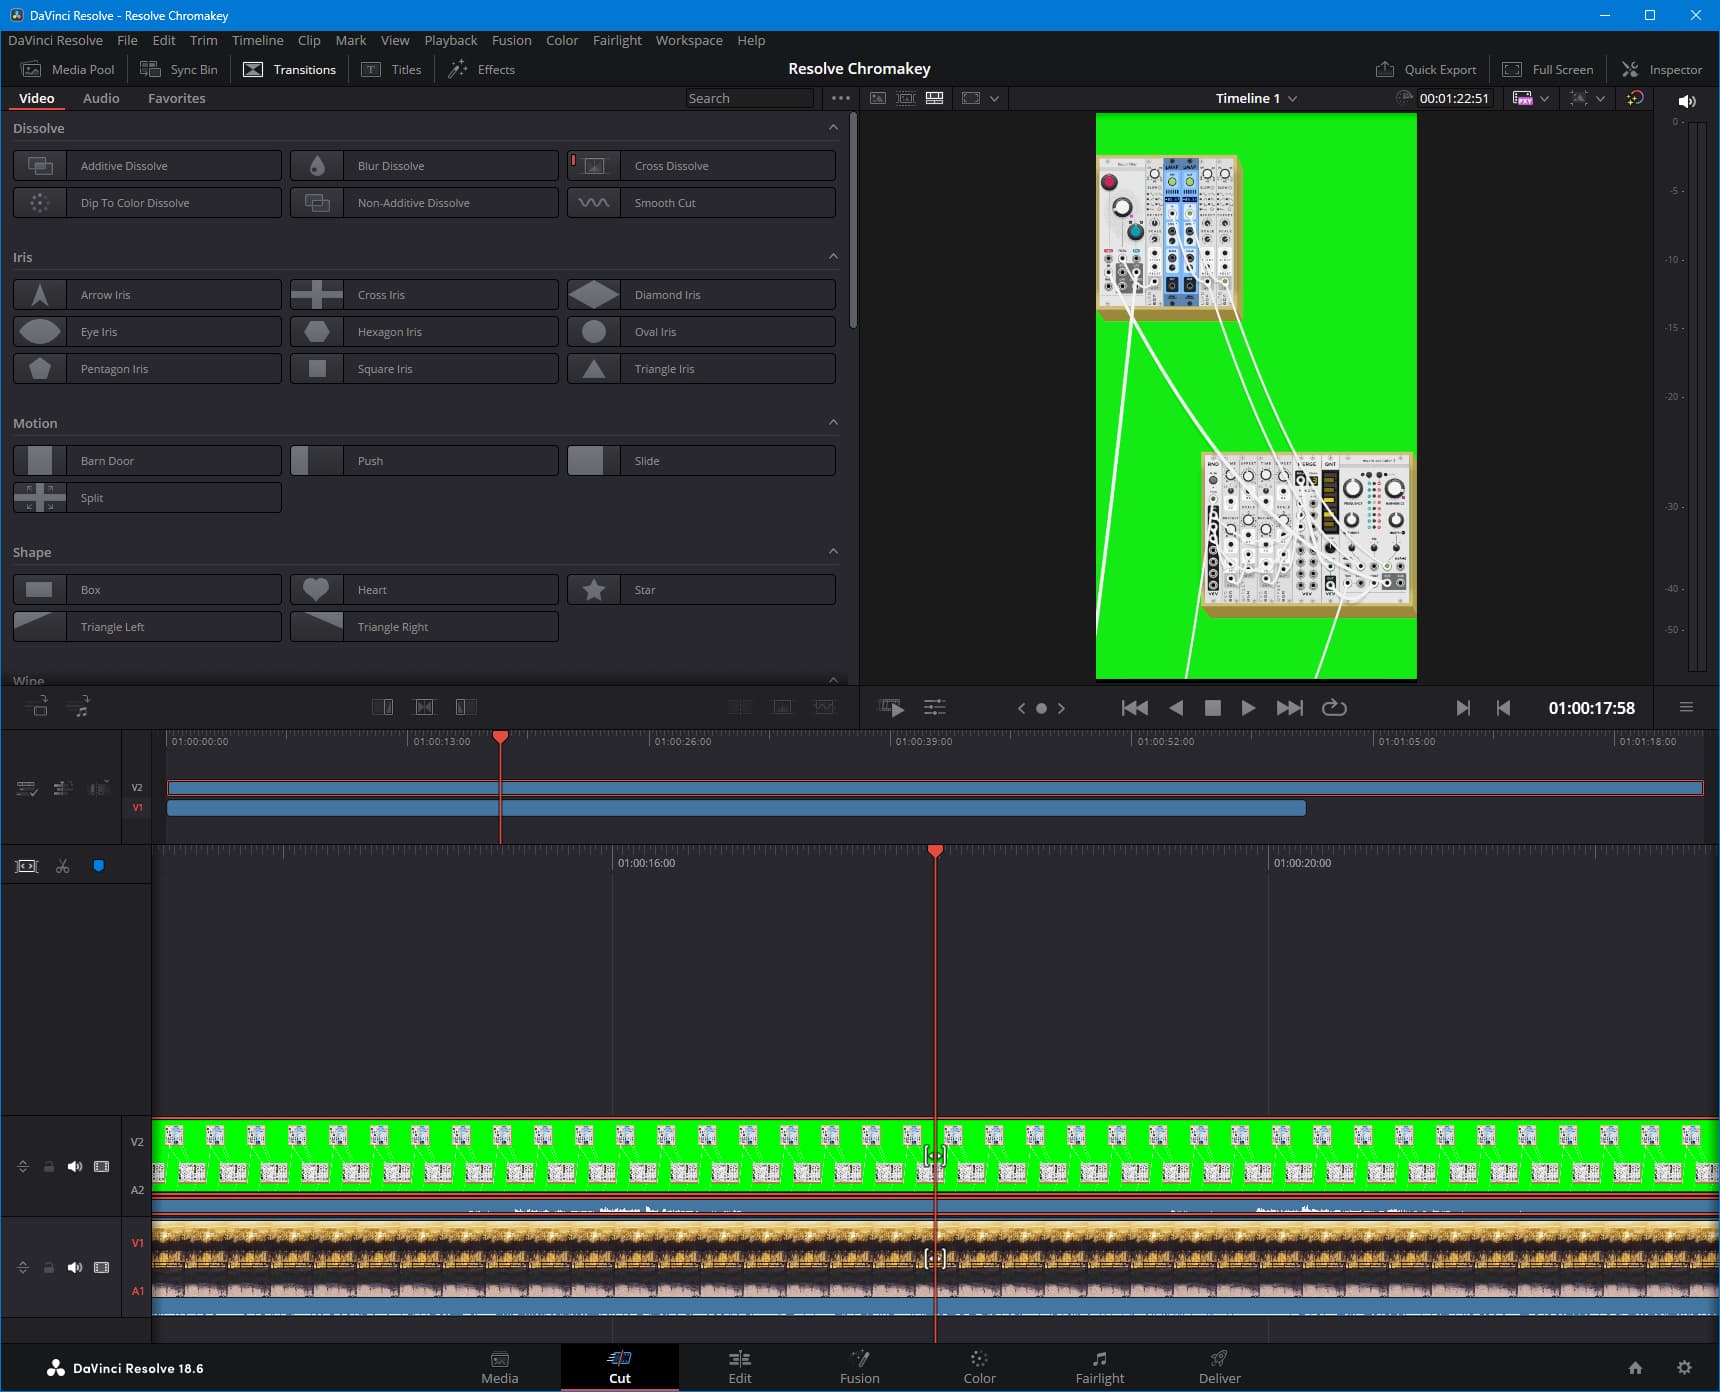
- To figure out how to make the chromakey effect in Resolve I followed this tutorial and used the
3D Keyer Effecton the Edit tab.
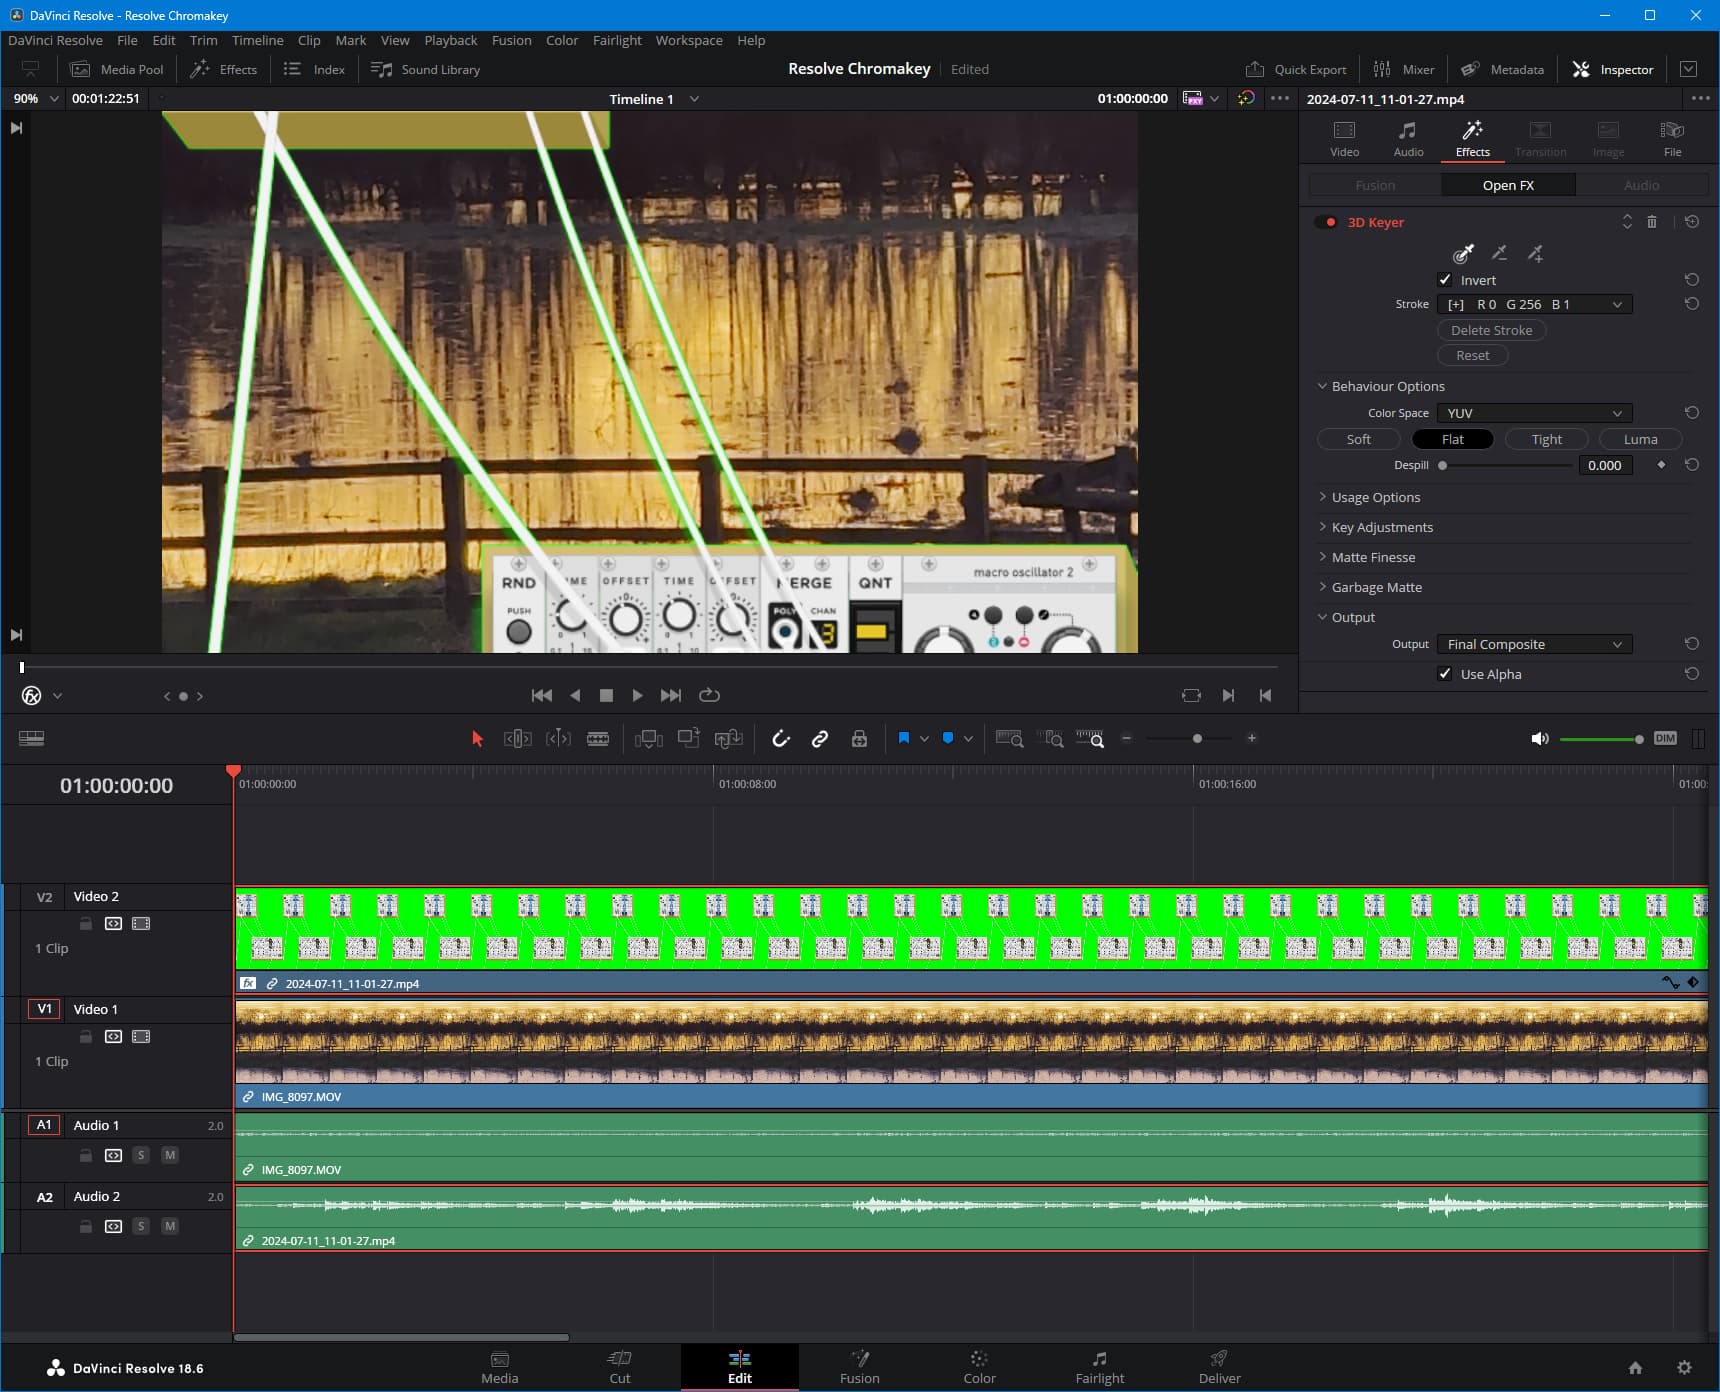
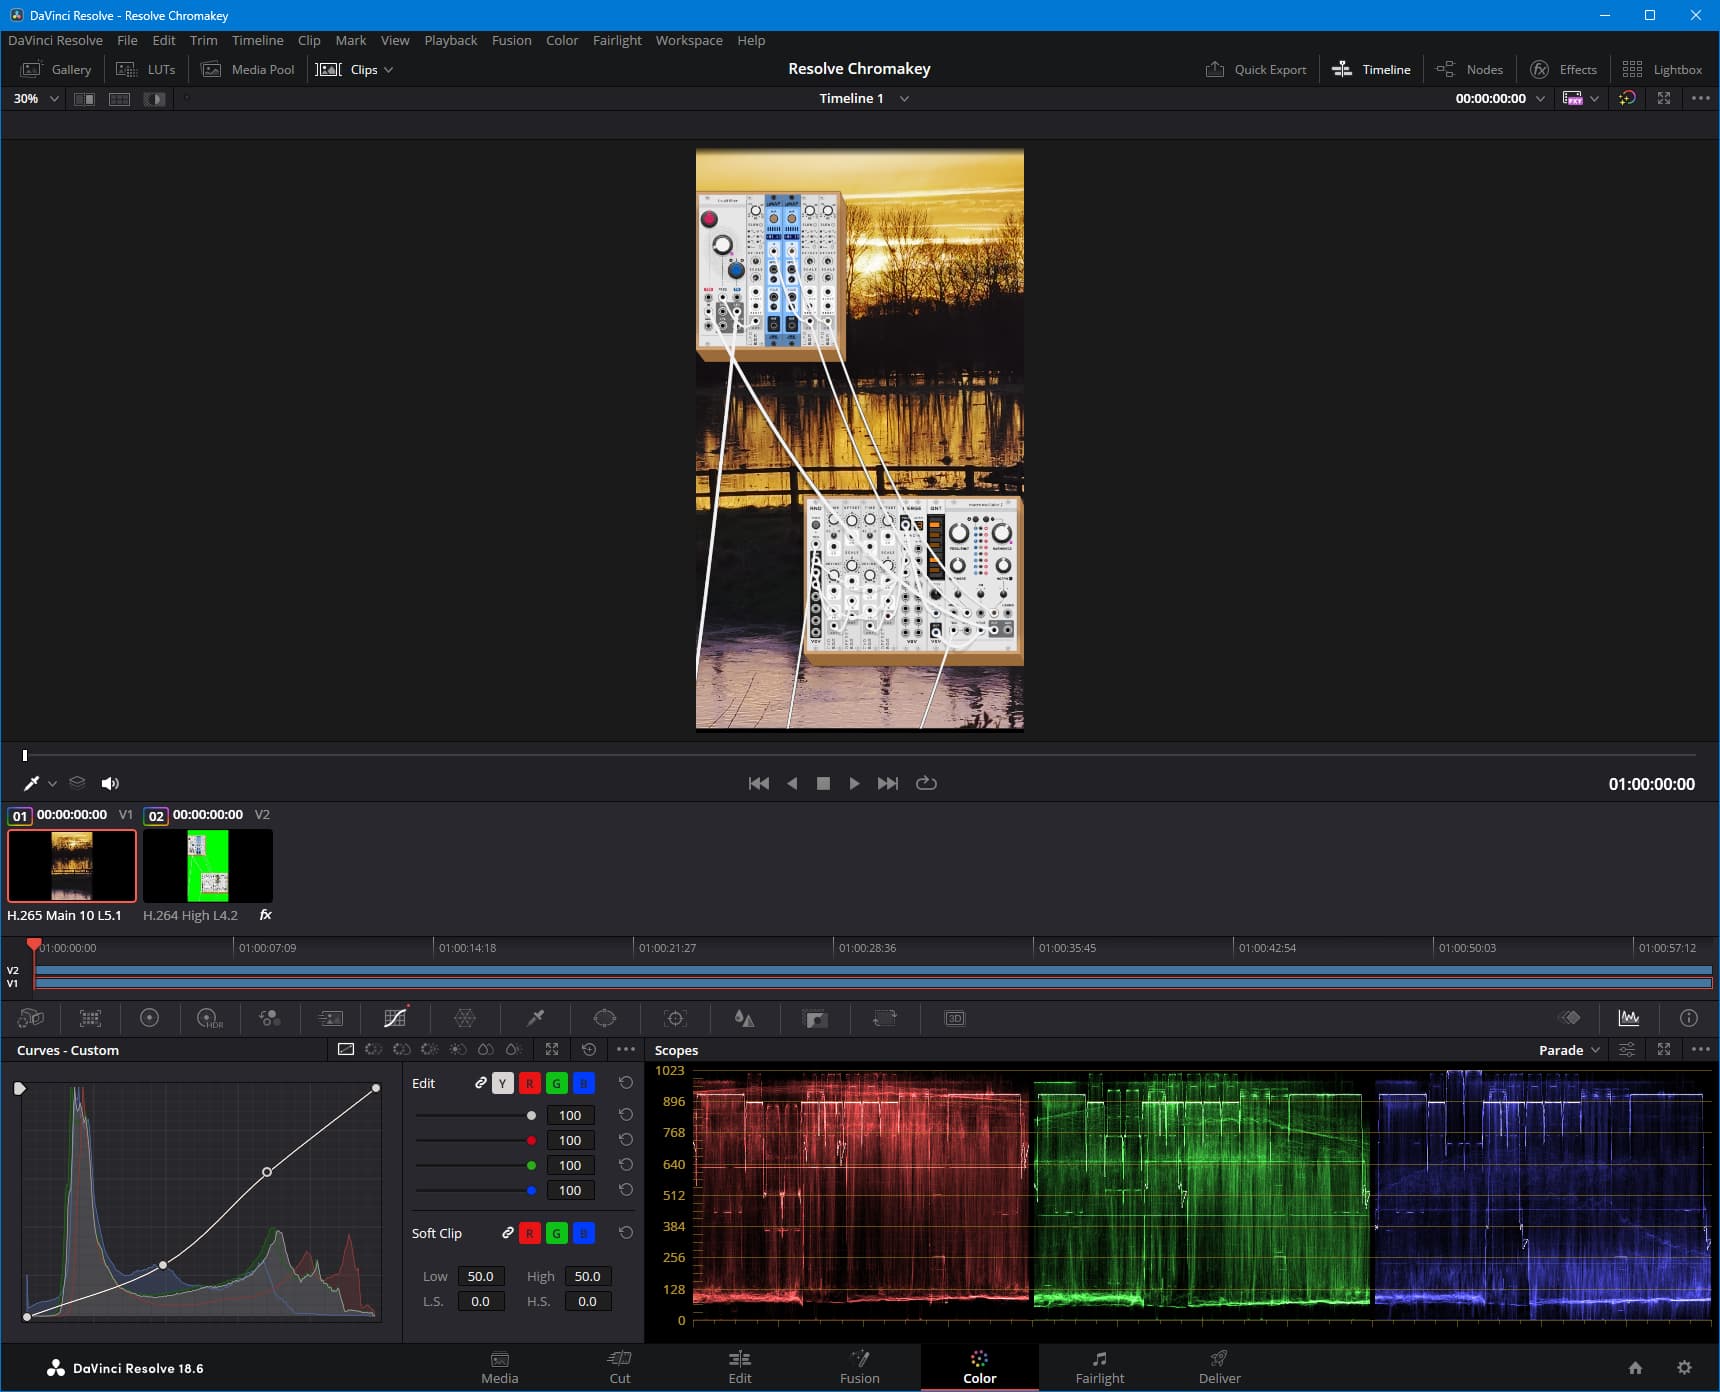
- Once I applied the 3D Keyer Effect it altered the colours of the video a bit, so I then tweaked it on the Colour tab.
- For my example I kept the audio track from the 2nd video of the birdsong, and I applied an EQ to the output bus on the Fairlight tab. I also used keyframes at the start and end to fade in and fade out the audio. Then all that is left is to export the video on the Deliver tab. (I won’t go into details on that, there are plenty of tutorials to be Googled).