Does the layout make sense? (If no - it’s useful info, tell me)
Do you understand what the module does? (If no - likewise)
I’m thinking of having 3 polyphony modes: monophonic, rotating 3 channels (3 seems like a sweet spot for performance), and as many channels as the last gate connected. Thoughts?
I’m not sure what to do if the user sets the length of the gate to be longer than the gate received. Queue 1ms of 0V then a retrigger? Let the gates collide into each other?
Should it default to unipolar or bipolar (and why)? Currently it’s unipolar.
Do you have other uses in mind than the one I have?
I think I grok this, but you’re never really sure ‘til the patchin’ happens.
One convenience that might be handy would be an input mode wherein a sequence of voltages could set the values of a row of knobs (or a polyphonic sequence could set multiple rows). This would be far easier than manually setting all 64 knobs (if I wanted to use them all and didn’t want their values to be random) and might open up the possibility of adding movement through modulation over time.
Do you have other uses in mind than the one I have?
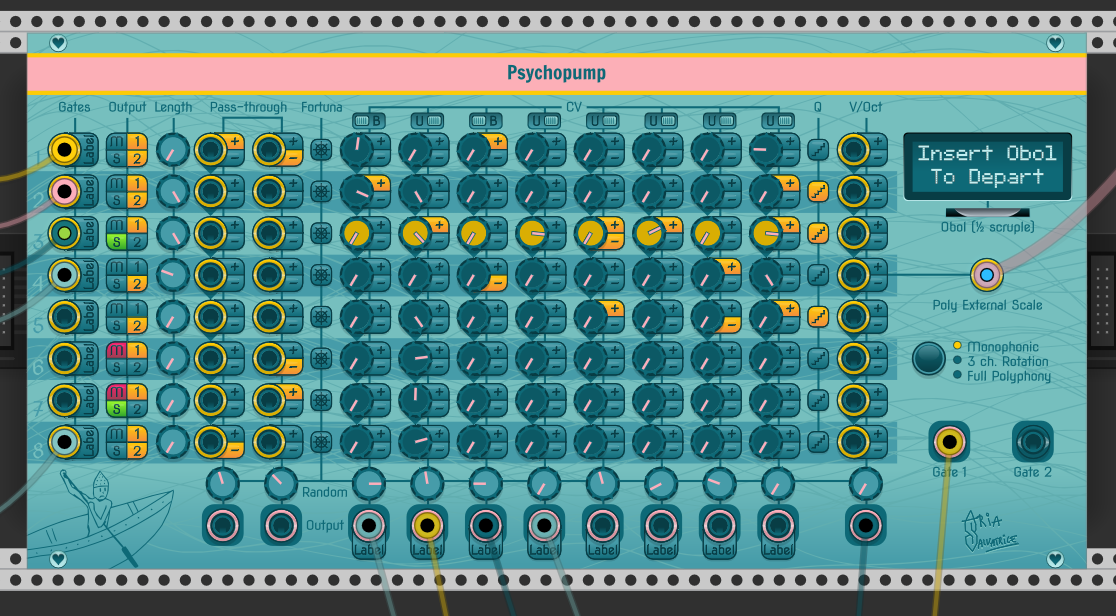
Here’s how it works, roughly left to right top to bottom:
Up to 8 gates are received from any source. The last received gate makes a channel row active, as indicated by the lit knobs.
You can mute and solo channels. You can send the gates received to output 1, 2, or neither.
You can optionally alter the length of the gates (or triggers) received from 1ms to 10sec. Fully to the left, gates are passed as-is.
The two pass-through columns accept CV. Empty inputs read the one above them until they find an input. The input of the currently active channel is passed to its corresponding output at the bottom, without any slewing. The corresponding random knob can add or subtract a random offset, if the + / - buttons of the input are active. The random offset is S&H’d on trigger.
The Wheel of Fortune randomizes the knobs to its right.
The 8 knobs can be set manually or randomly. At the top of the column you can pick between unipolar (0V - 10V) and bipolar (-5V - 5V). The random offsets work the same.
The V/Oct input works the same as a pass-through input by default, but you can quantize it in two modes (similar to QQQQ): add semitones then quantize (yellow), or add scale degrees (). If provided a Poly External Scale, it uses it. Otherwise, it uses the chromatic scale. The random knob is stepped (12 steps).
When you click a “Label” button, it lets you name a channel or an output. It will show up on the LCD when you turn knobs:
All Psychopump units are provided with a complimentary Obol (required to cross the river Styx) pre-inserted in the appropriate slot.
In 3-channel rotate polyphonic operation, it works the same but rotates the signals across 3 poly channels, using a new one each trig. Thus, it can handle up to 3 simultaneous triggers.
In full poly operation, it uses as many channels as the last gate plugged in, and does not rotate them.
I have slightly altered the font that shows up on LCDs, as I was not satisfied it was low-tech enough on a Windows HDPI tablet.
While scanlines aren’t very realistic, they convey well the idea it’s a cheap LCD while remaining readable on SDPI 100% zoom. I think a pixel grid would be hard to read, making a mess of subpixel hinting.
Next time you try out an automatic build, please let me know if it’s looking correct on your end. I just pushed it to github so I can grab an automatic build to try on my tablet, as I’m way too lazy to fetch a USB stick to transfer files when I can ask Bill Gates to simply build a few dozens of thousands of lines of code on his computer for my convenience.
It’s really what it’s supposed to be, i think. I just call it a LCD in the more colloquial sense. I think my design philosophy isn’t being “hardware accurate” but “hardware plausible”, as in “this could totally be done irl if a fool were willing to drop 2000 currencies on this absurd misuse of boutique components, packed too small to be operated by the fingers of grown-ups”
The code still isn’t usable, but I’m making progress on implementing the functionality… The concept sounds deceptively simple, but some features make it pretty challenging, especially the ability to alter gate length.
Anyway, pretty clear by now that my niche isn’t crazy good DSP algorithms, but creating UIs that inspire workflows.
Because of the complexity of thinking about delay, I felt more comfortable with an arbitrary value rather than a value that can change. I picked 5ms, I hope it will work for most users. The intended use cases is modules that snapshot CV on trigger: if you wish to process the CV output by Psychopump, the gates would arrive before the CV. I also hear that in the case of the hardware Akemie’s Taiko, you have to delay the gate or it doesn’t snapshot properly. There’s probably a few more like that.
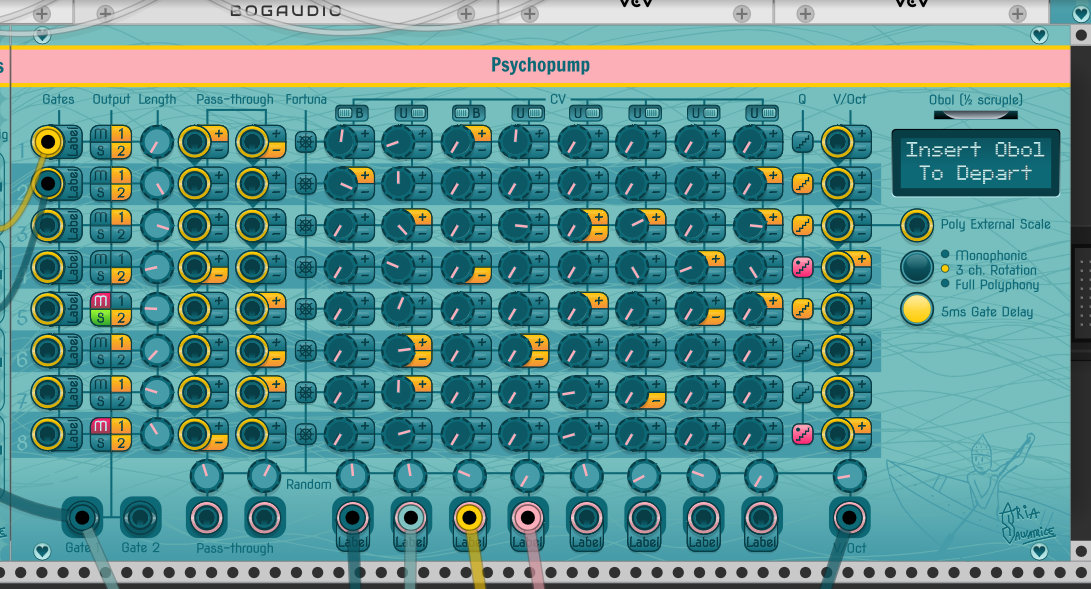
I revised the UI a bit more, there’s more space for Charon. I think I’ll have to go with a bitmap illustration or a silhouette, vector lineart only really works for simple cartoon characters.
I only have the first channel working properly (I have yet to implement output rotation in monophonic mode), but I have most of the tricky features working!
The delay, and lengthening gates while keeping them retriggerable, was a hard one. A few design choices I made to simplify the code:
The gate delay is 5ms, you can’t change it
Enabling/disabling the delay stops any gate that was still sustaining
When the delay is active, the silence added during retriggers lasts 5ms instead of 1ms
It doesn’t really show the intended use, but it’s nice that it’s finally starting to emit signals.
Not sure I totally understand everything this module is doing but the core idea is great! A few notes:
I’d change that “output” label in the top left to something like “gate bus” to clarify the distinction from the CV outs
There should be some kind of indication that what the “random” knob is introducing is an offset
I’d remove the horizontal line going through the knobs, it implies that each knob is affecting it’s neighbours or passing something through like a matrix mixer
Are the pass-through inputs offsetting all the CV outs for the row they’re on? How do the two inputs interact? If it works the way I think it does, I think it might be better just to leave the quantizing out, it’s trivial enough for a user to insert one in the CV path.
Pass-throughs are basically sample and holds +/- random offset, and the quantizing is there because I think people will want to use it to sequence Elements / Rings, and create random rhythmic apreggi using PES sequences.
Even if I provide a 5ms delay, I think many users do not intuitively understand intuitively how each module adding 1 sample of latency interacts with modules that snapshot CV on trigger, so I’m trying to provide something that makes it easier to discover this behavior when it’s time to learn about it.
Pass-throughs are basically sample and holds +/- random offset,
So when the pass-throughs are connected, are the knobs influencing the CV output at all?
Maybe try adding a knob that adds a variable delay to the output, with 5ms as the minimum value? Might get the idea across more directly while being useful in itself.
Each knob at the bottom is basically a 5V random offset, which is only active if the corresponding +/- button is active on that row - except for pitch, where it’s 12 semitones. If both +/- are active, it effectively doubles the range of randomness. A use case I have in mind for them is to apply a subtle change to each drum hit to avoid the machine gun effect where a more analog sound is desired.
Pass-Through will probably be named S&H, I used this name when it was less clear in my mind how my abomination was supposed to operate.
A user-configurable delay is definitely a recipe for an algorithm I can no longer reason properly about, so I’ll leave it up to people to patch their own delay if they want more than what’s necessary for modules that snapshot CV.
I have a use case in mind for everything, but I think it will lend itself to a lot of other uses once people understand what it does, and when I release it I’d like to show off multiple ways to use it. I’m thinking of it as a performance controller, not as enabling previously impossible workflows. If it’s popular I’ll probably make small variants de-bundling features.
Pushed another version, most features are present now, please try it out, or I will inflict this code untested on the library within hours. Maybe more than 24 hours, but I’m just trying to instll a sense of urgency here.
Here’s another quick video example - it’s not just for drums!
And if you wonder “why not just use multiple instances of the synth”,
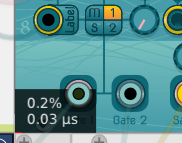
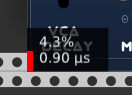
Ok, TBH my UI code is not that good and not measured so the performance impact is higher than measured. The performance is just a bonus, I hope the workflow is the appeal of the module.