I want to make beautiful ambient guitar swells. This classic video tutorial from Andy Othling shows the typical way to achieve this with an electric guitar and a volume pedal. His video is amazing, and the effect sounds beautiful. The only problem is that he’s using several thousand dollars’ worth of guitar pedals.
I wanted to see if I could reproduce that same effect with an acoustic guitar and no pedals, just free software on my laptop. After some trial and error, I’m happy to share this short tutorial to show you how I built this patch in VCV Rack to create a beautiful automatic volume swell for ambient acoustic guitar.
I recorded a quick demo here, and I’ll explain the patch in detail, below.
")
You can download the patch here.
Stage 1: Automatic Volume Swells
The most important part of this patch is that it needs to cut off the harsh attack for the split-second after you pluck or strum the guitar. It’s a bit like bowing a stringed instrument: the volume starts quietly, gradually swells in, and then gradually fades out. I achieved with this an envelope follower, comparator, ADSR, and VCA.
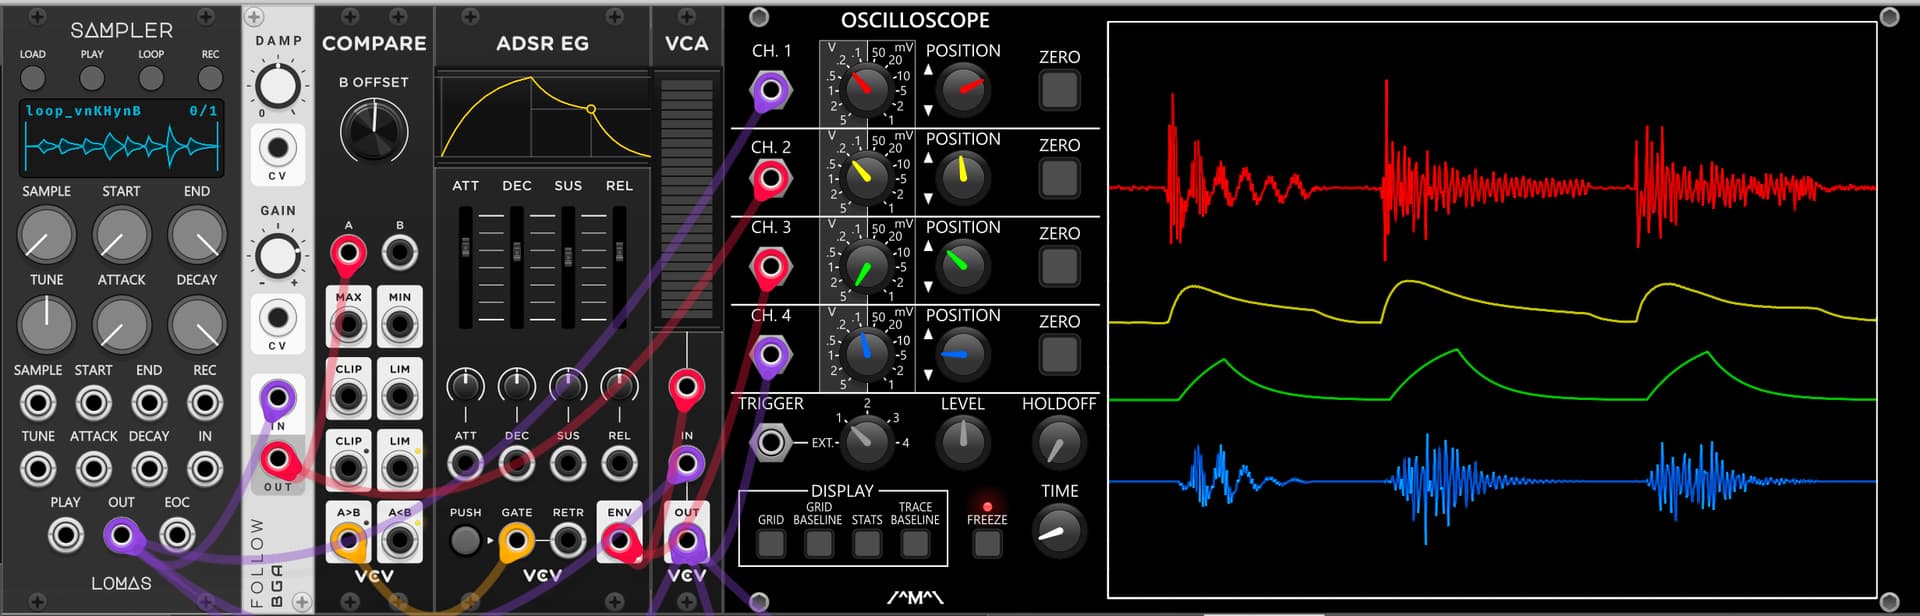
For this demo, I recorded the input audio sample into the Advanced Sampler, but for playing live guitar, the input signal would normal come directly from my microphone.
- The input audio goes to the envelope follower (Bog Audio Follow), which generates a CV output matching the amplitude of the audio signal, with the rapid transients smoothed out (I got good results with smoothing set to 50%).
- That CV signal is sent to a comparator (VCV Compare), which generates a gate signal when the input CV exceeds 0.2V (you will need to adjust this voltage depending on the dynamics of your input signal).
- That gate signal triggers an envelope generator (VCV ADSR EG), with Attack, Decay, and Release all set to around 400ms, and about 60% Sustain.
- That envelope controls a VCA (VCV VCA), which controls the volume for the original audio signal.
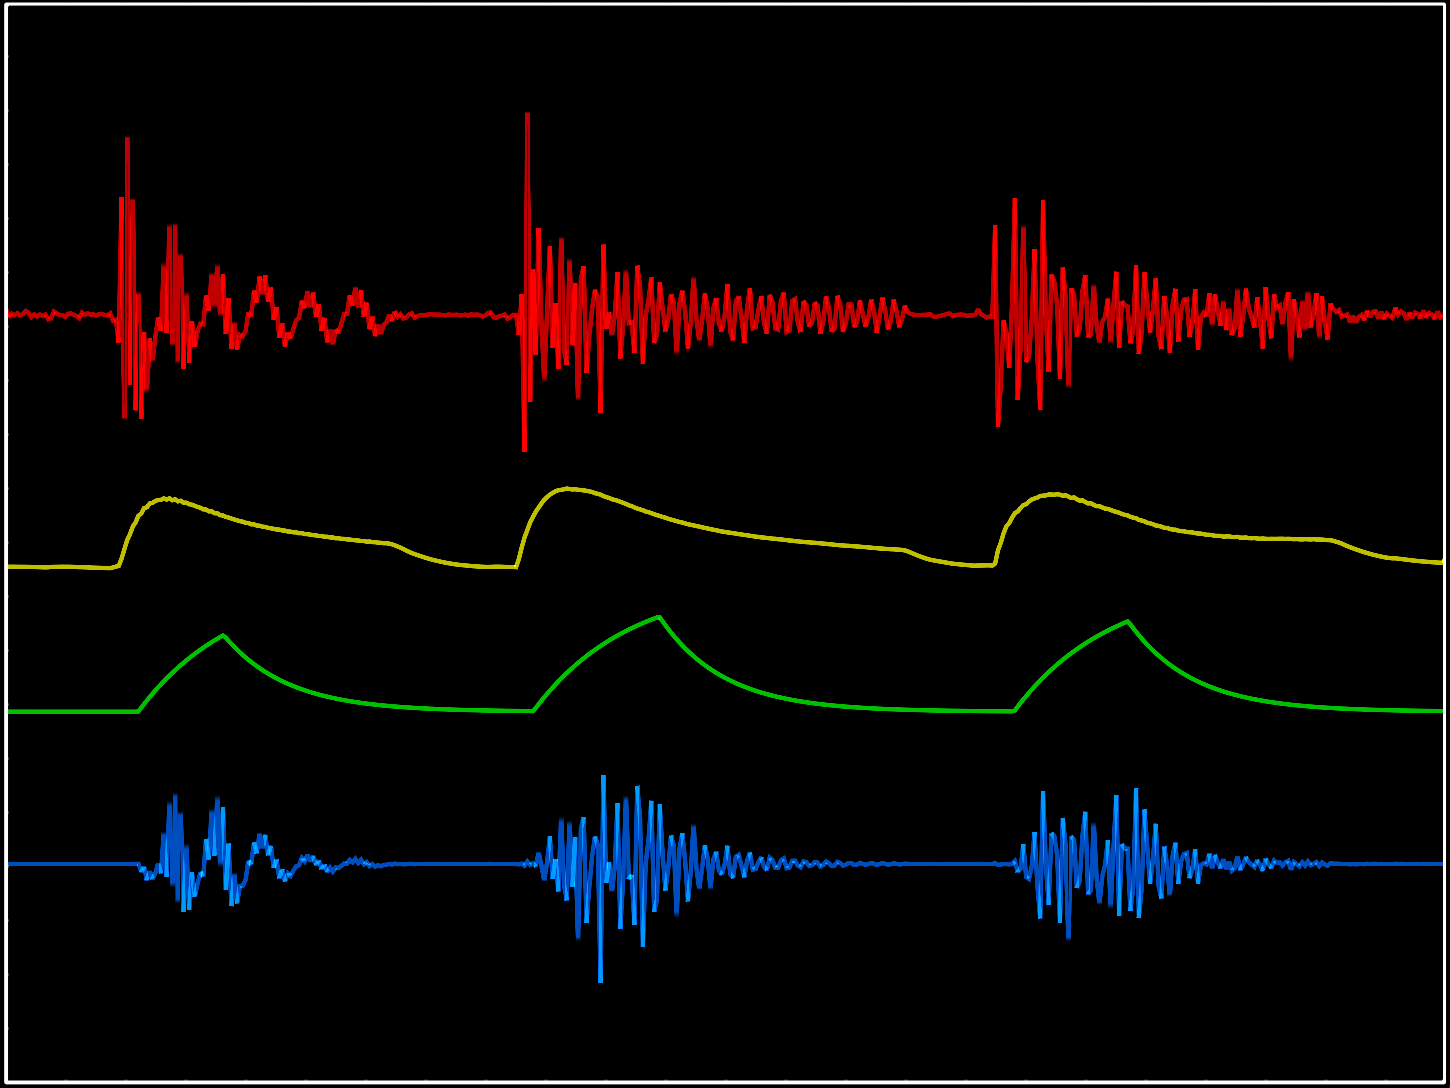
The oscilloscope (Count Modula Quad Trace Oscilloscope) illustrates what’s happening: the original audio signal is red, the output of the envelope follower is yellow, the ADSR envelope is green, and the final audio signal is blue.
Stage 2: Polyphonic Octave Generator
To increase the awesomeness of the sound, I take three copies of the Stage 1 output and mix them together: channel 1 is dry, channel 2 adds a sub-octave to the low end, and channel 3 adds an octave-up to the high end.
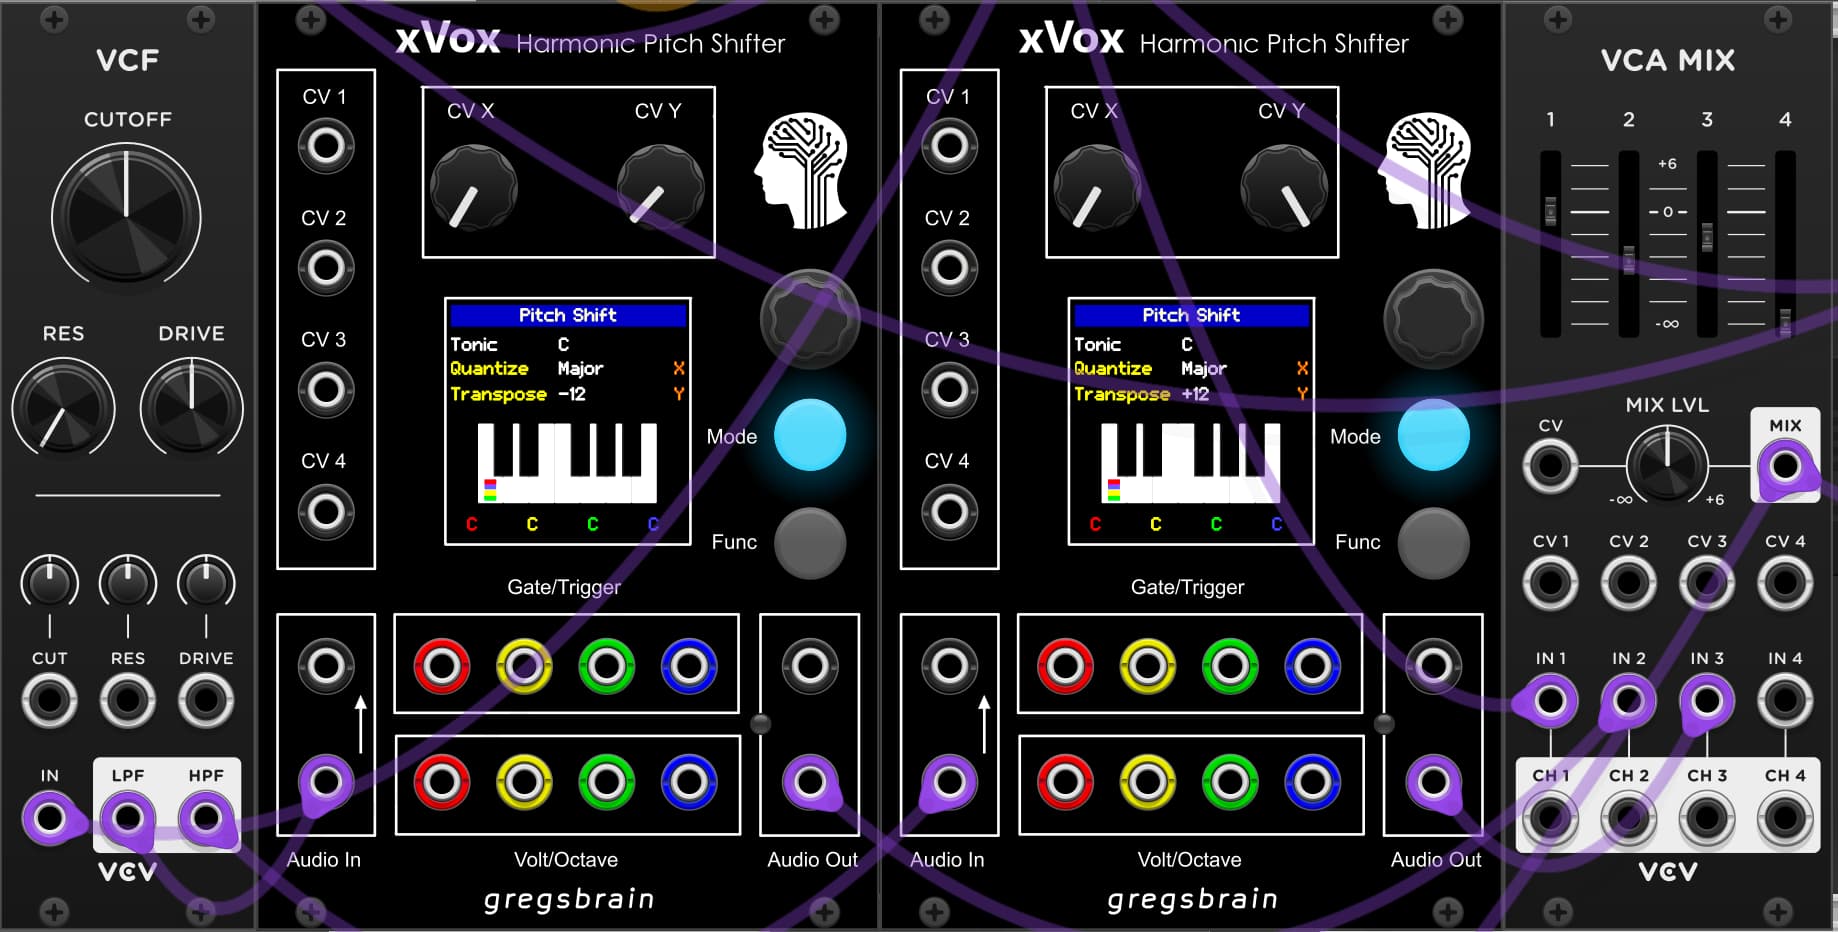
I’m using the low-pass and high-pass outputs of the built-in filter (VCV VCF) to split the signal, and then routing them through the excellent xVox Harmonic Pitch Shifter to add the octave effects.
Stage 3: Multi-stage Delay & Reverb
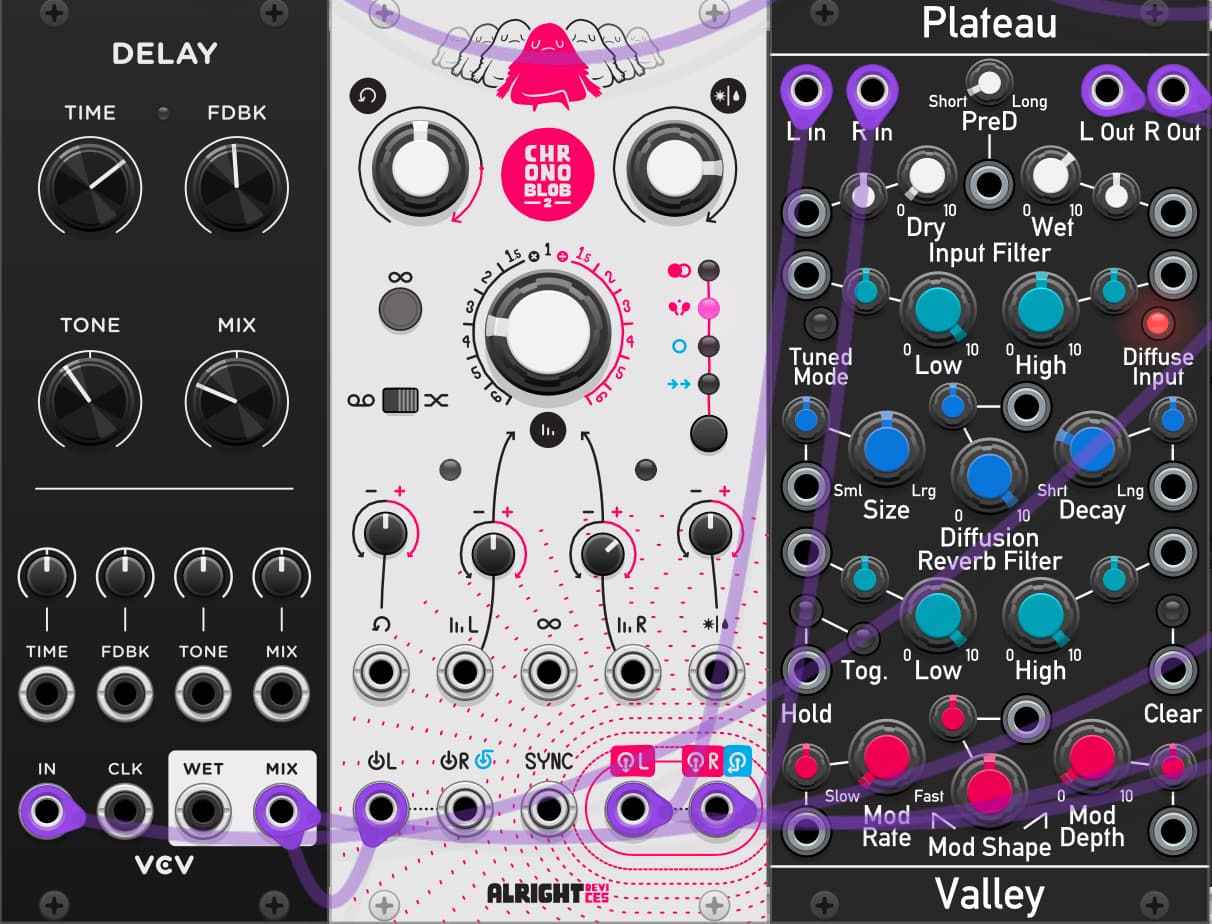
Following the example from Andy Othling’s tutorial, the output of Stage 2 is routed into two delays in series (VCV Delay, Chronoblob2) to increase the sustain and add stereo width. Finally, I added a lot of wet reverb (Plateau) to make it sound holy!!!
I enjoy the fully wet signal from Stage 3, but if you prefer to retain some of the acoustic guitar sound, it’s also nice to mix back in a little of the dry signal after the reverb.
